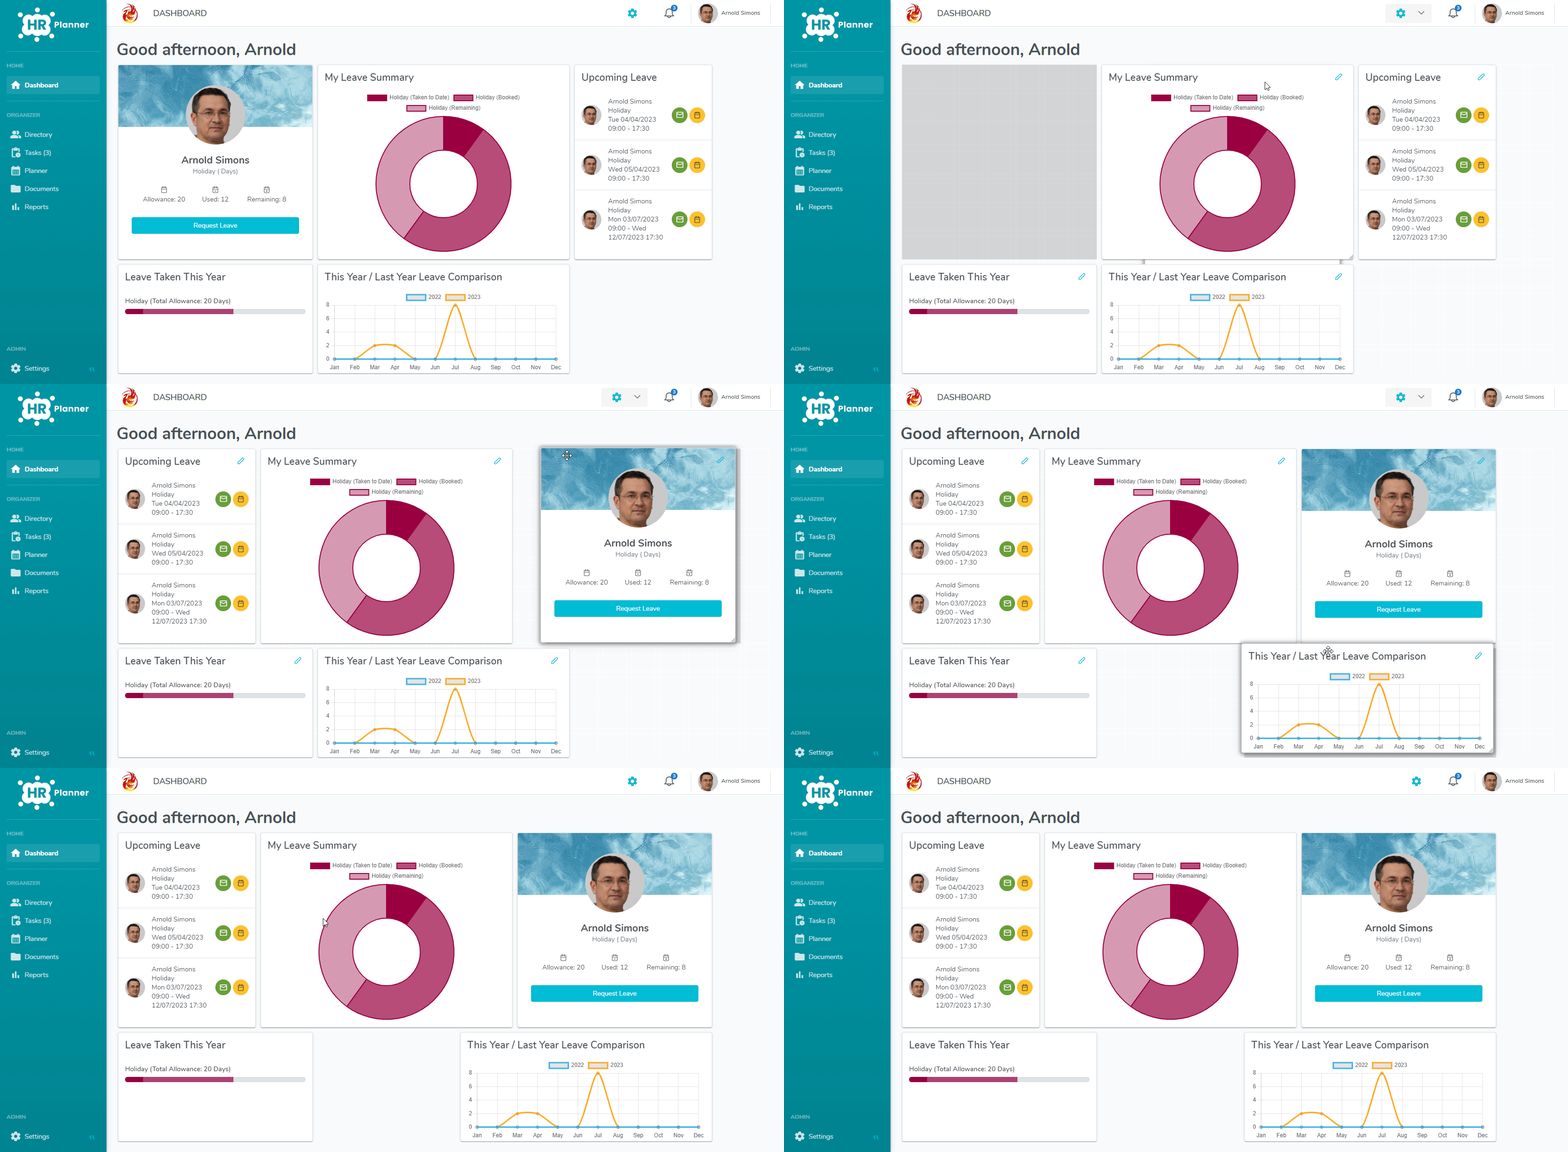
You can Add, Edit, Delete, Resize and Move all of the Dashboard widgets where-ever you like. It’s your dashboard so arrange it how you like it.
Dashboard Reset
If you need to reset your Dashboard back to the Organisation default then simply follow these steps
- Click the Cog in the top right of the screen to enter Edit mode.
- Select Restore to Default from the menu.
- Confirm your choice by ticking Yes I’m sure and pressing the Restore to default button.
- Click the Cog again to exit Edit mode.
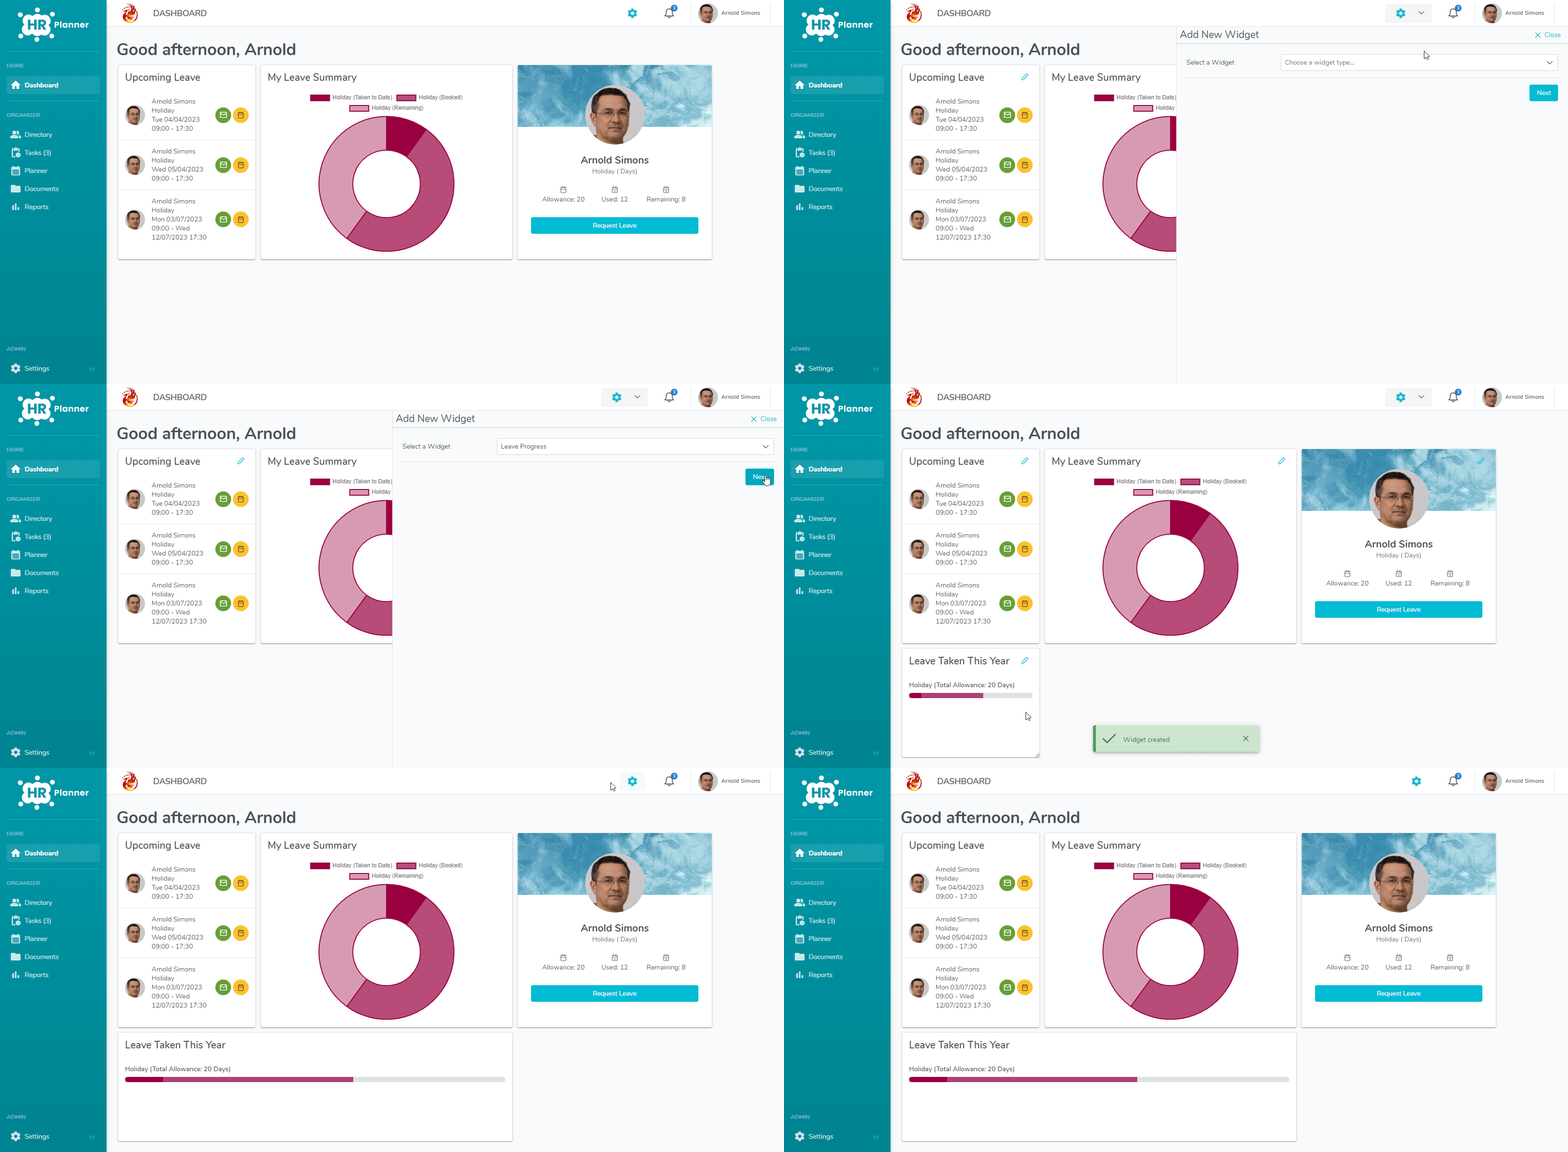
Add a Widget
You can add as many widgets to your Dashboard as you like with each one having it’s own Content Type and filter.
- Click the Cog in the top right of the screen to enter Edit mode.
- Click on the arrow next to the Cog to display the menu.
- On this menu select Add Widget.
- Next, choose your widget e.g. Request Log and click Next.
- Select the options and finally press Create Widget.
- Drag and Resize the Widget where you would like it to display.
- Click the Cog again to exit Edit mode.
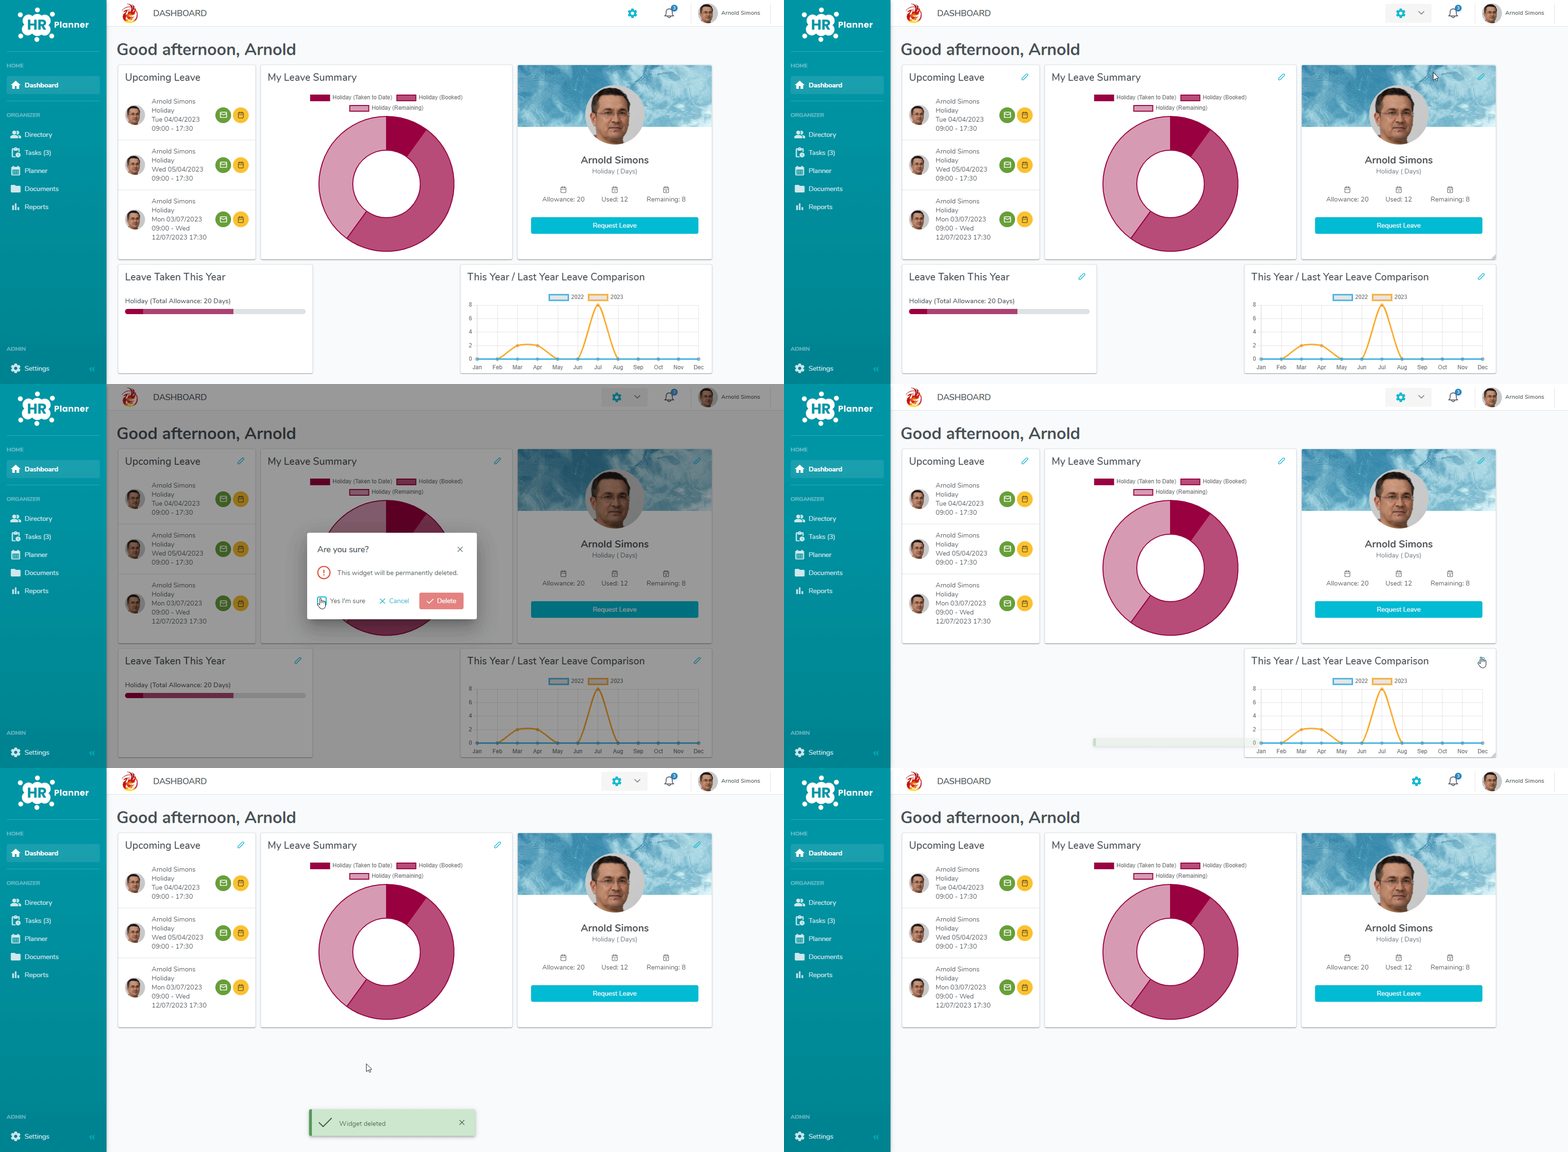
Delete a Widget
- Click the Cog in the top right of the screen to enter Edit mode.
- Once the pen has appeared on the Widgets you can now click on the pen and select Delete which will remove the Widget.
- Click the Cog again to exit Edit mode.
Move a Widget
- Click the Cog in the top right of the screen to enter Edit mode.
- Once the pen has appeared on the Widgets you can now move them around.
- To reorder click and drag the Widgets around.
- Click the Cog again to exit Edit mode.