
Enhance employee training with this guide on utilizing the Forms feature in HR planner for employee appraisals.
1. Introduction
From creating your form, distributing to employees, completing and viewing results, this walkthrough will help you streamline the appraisal process efficiently.
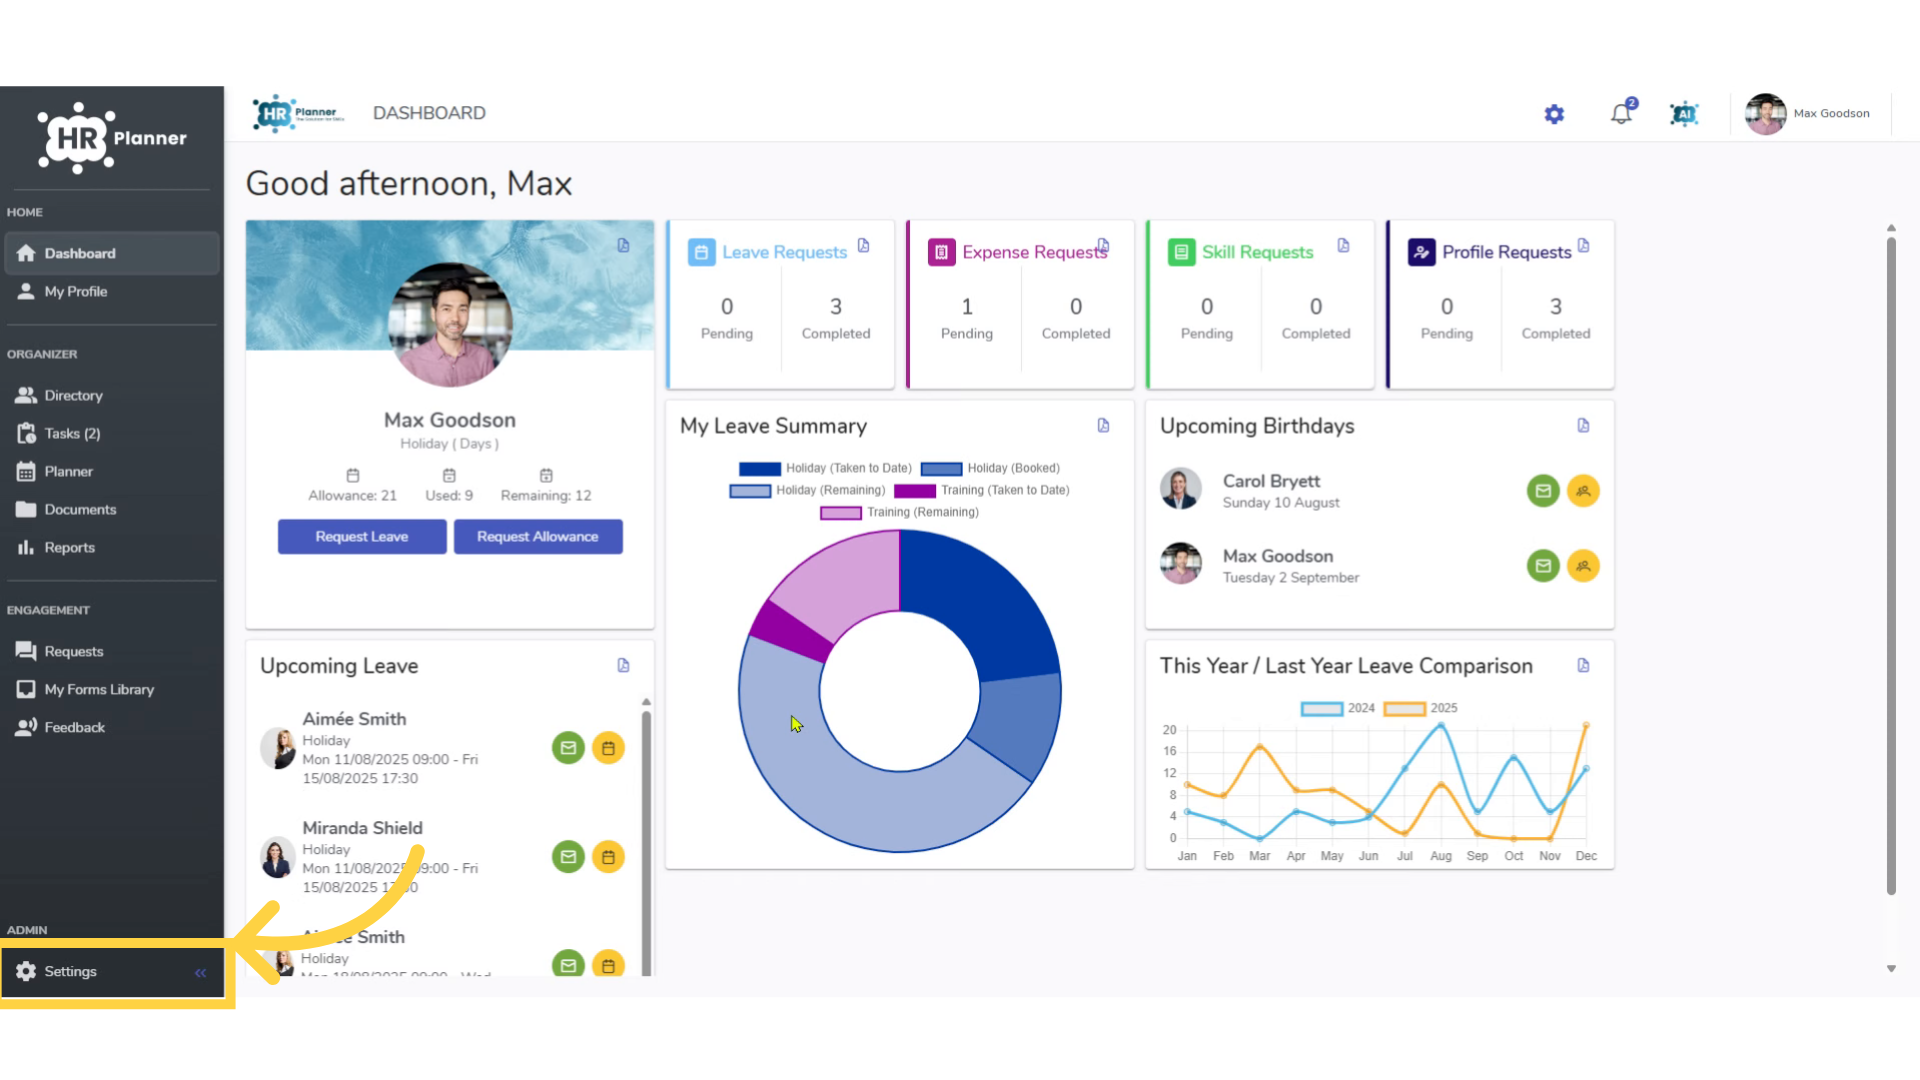
To create a form, access the Settings section.
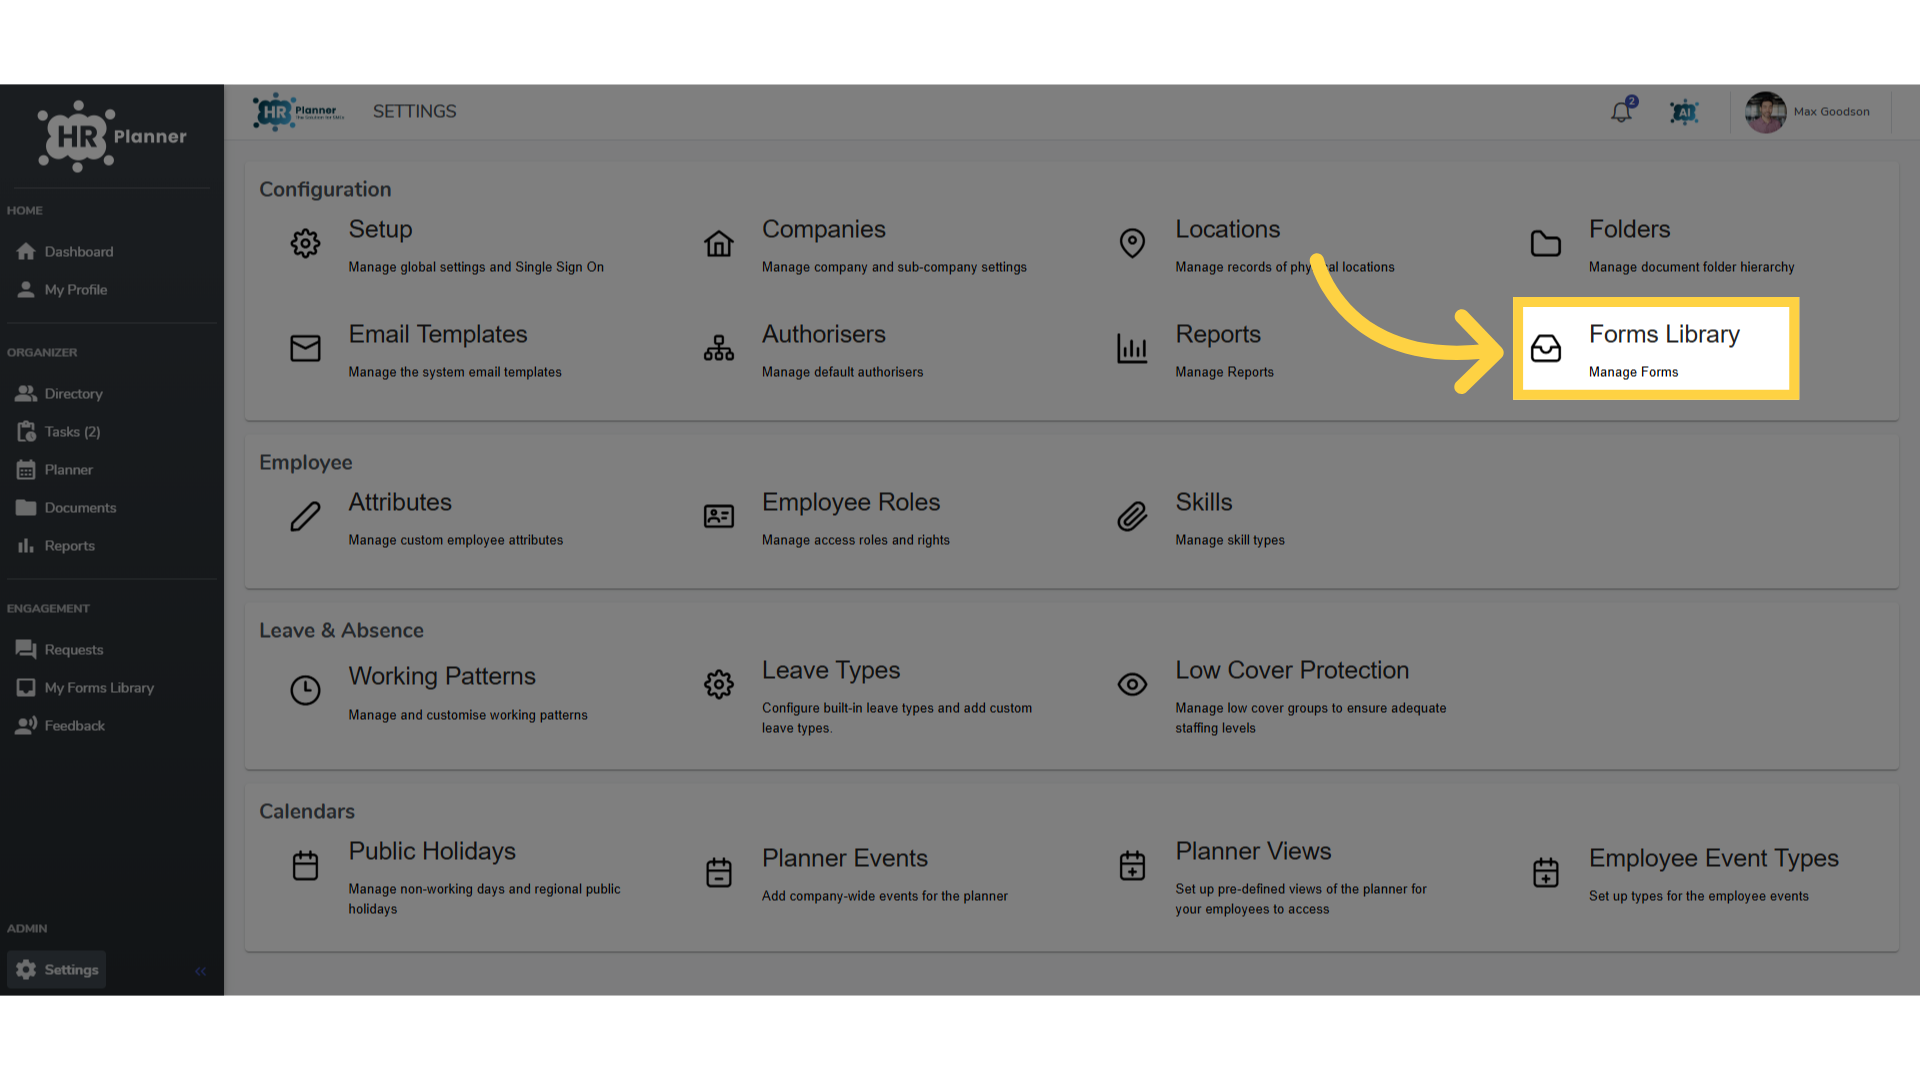
2. Select “Forms Library”
Navigate to the Forms Library section.
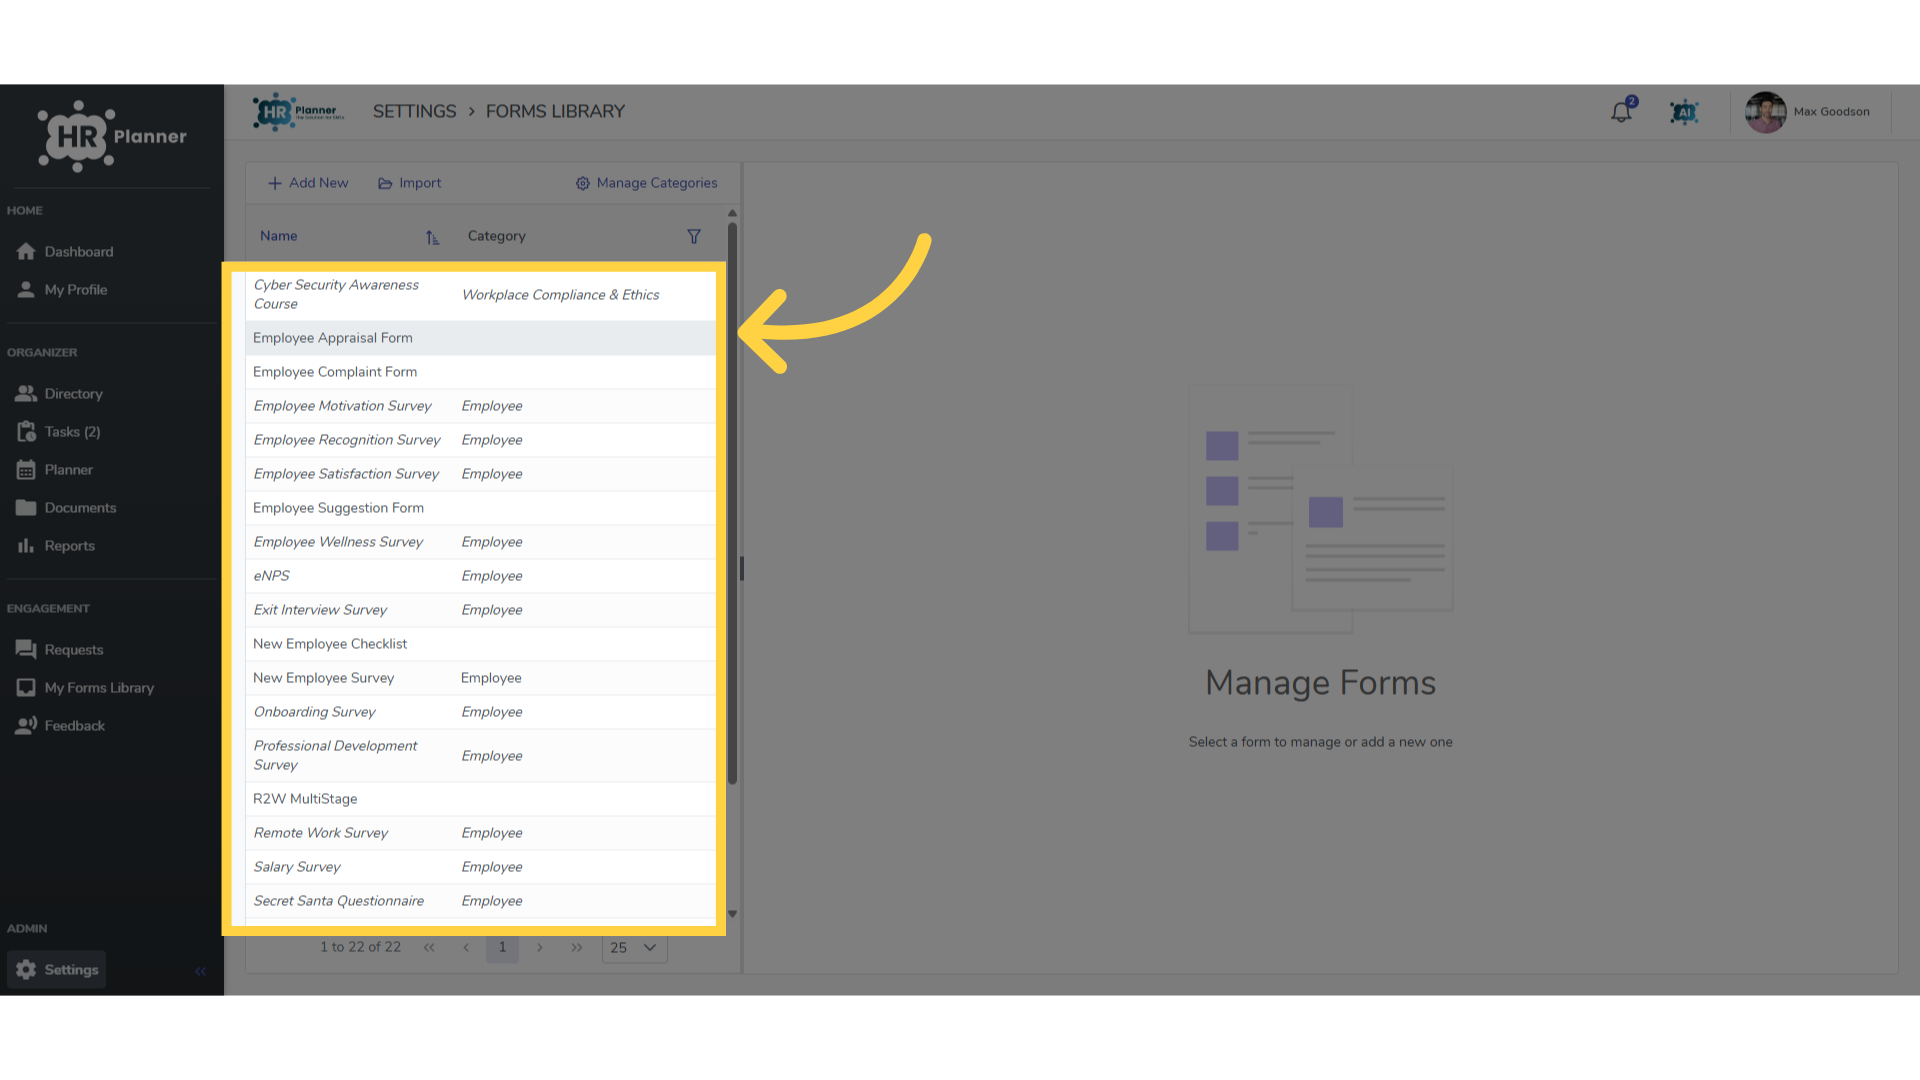
3. Click “Employee Appraisal Form”
You can create your own forms or select from the library
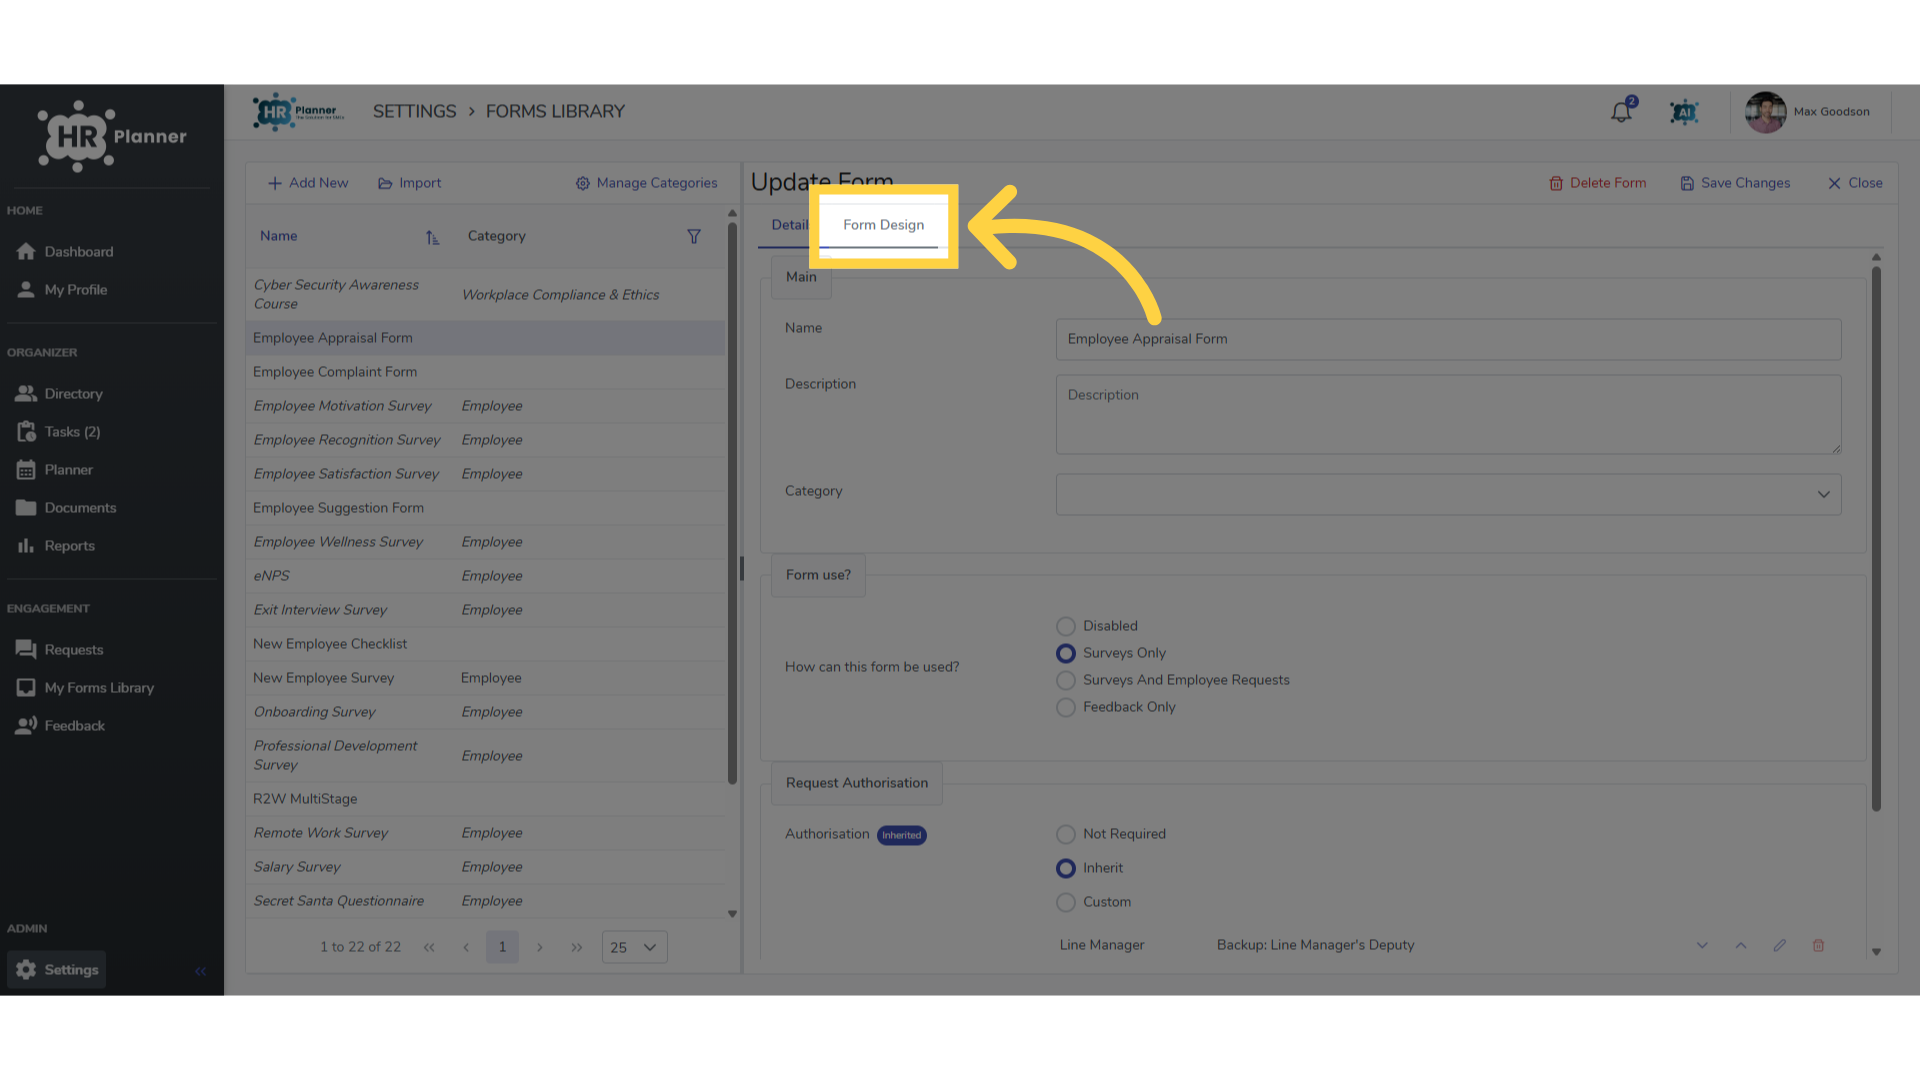
4. Click “Form Design”
In the Form Design section you can add questions.
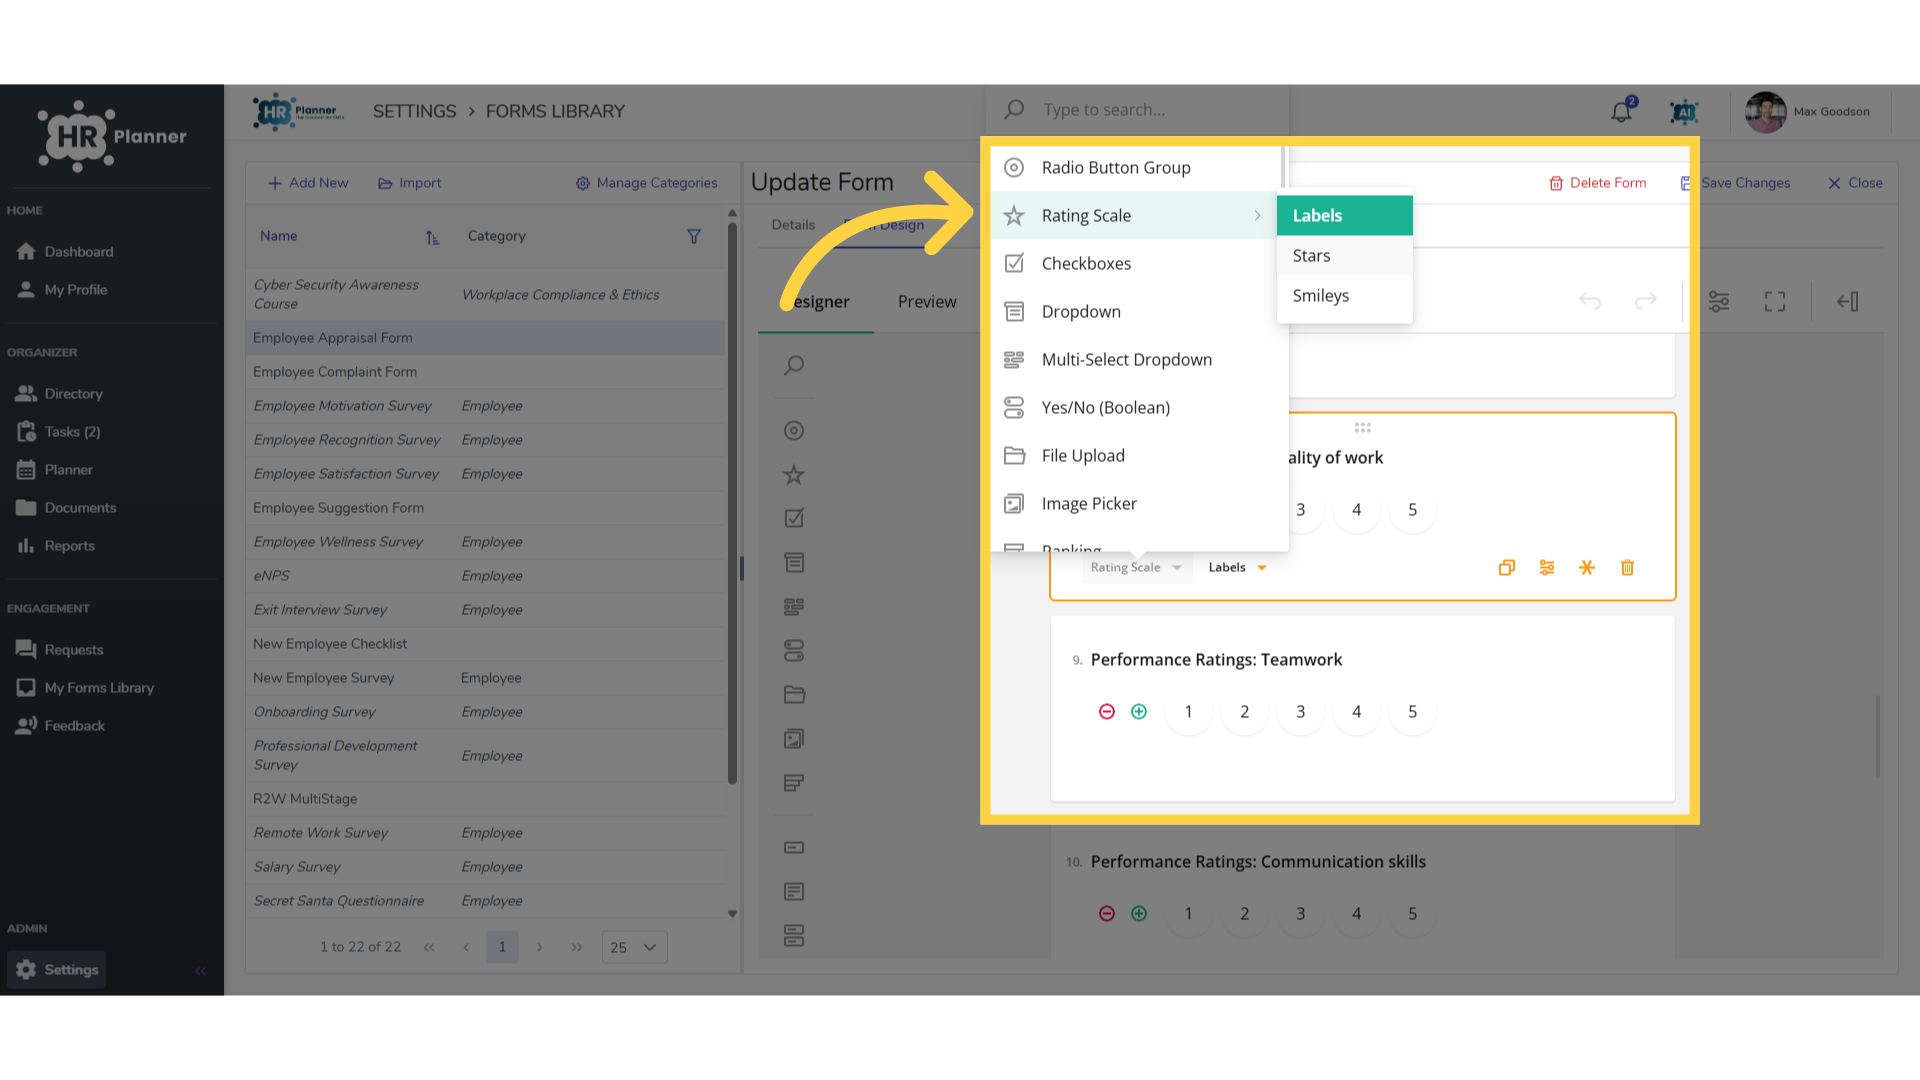
5. Change styles
and tailor the style including rating scales, drop down lists and free text.
6. Sending Forms
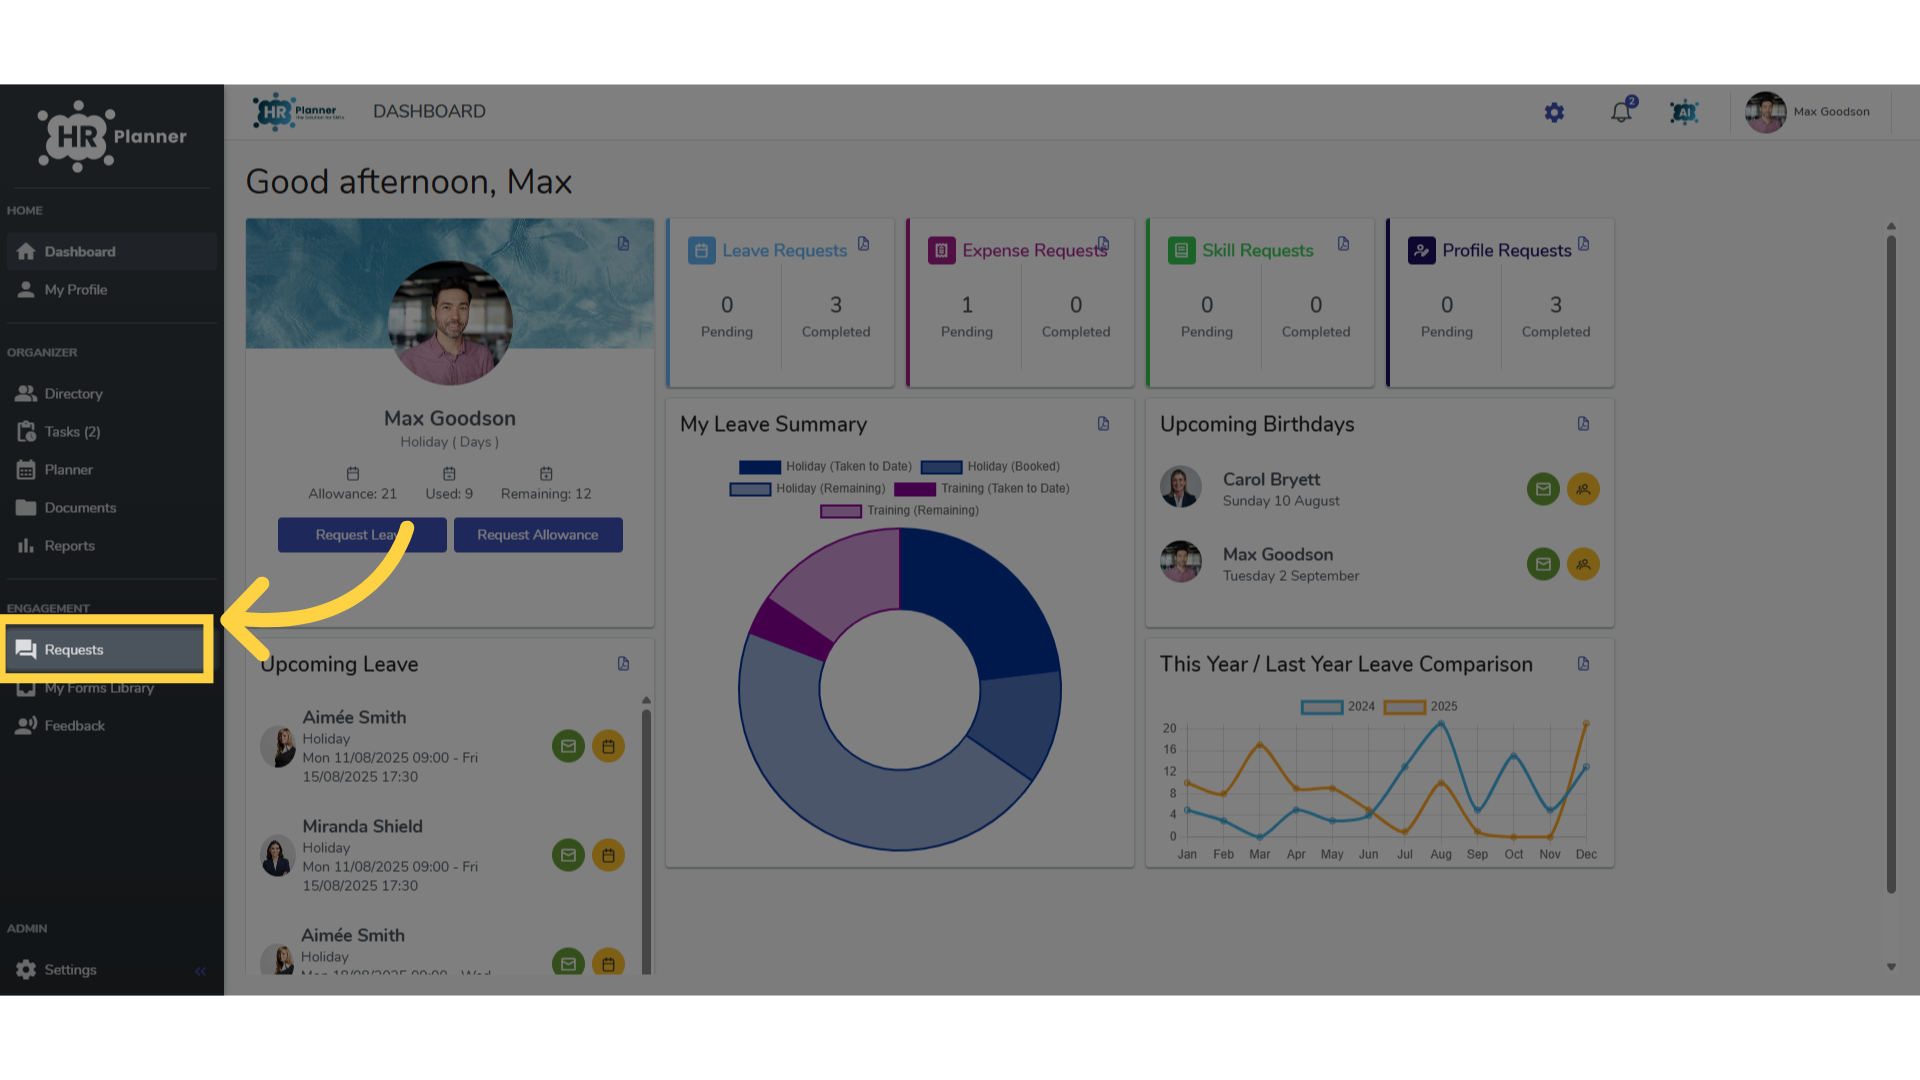
To send forms to employees click the Requests section.
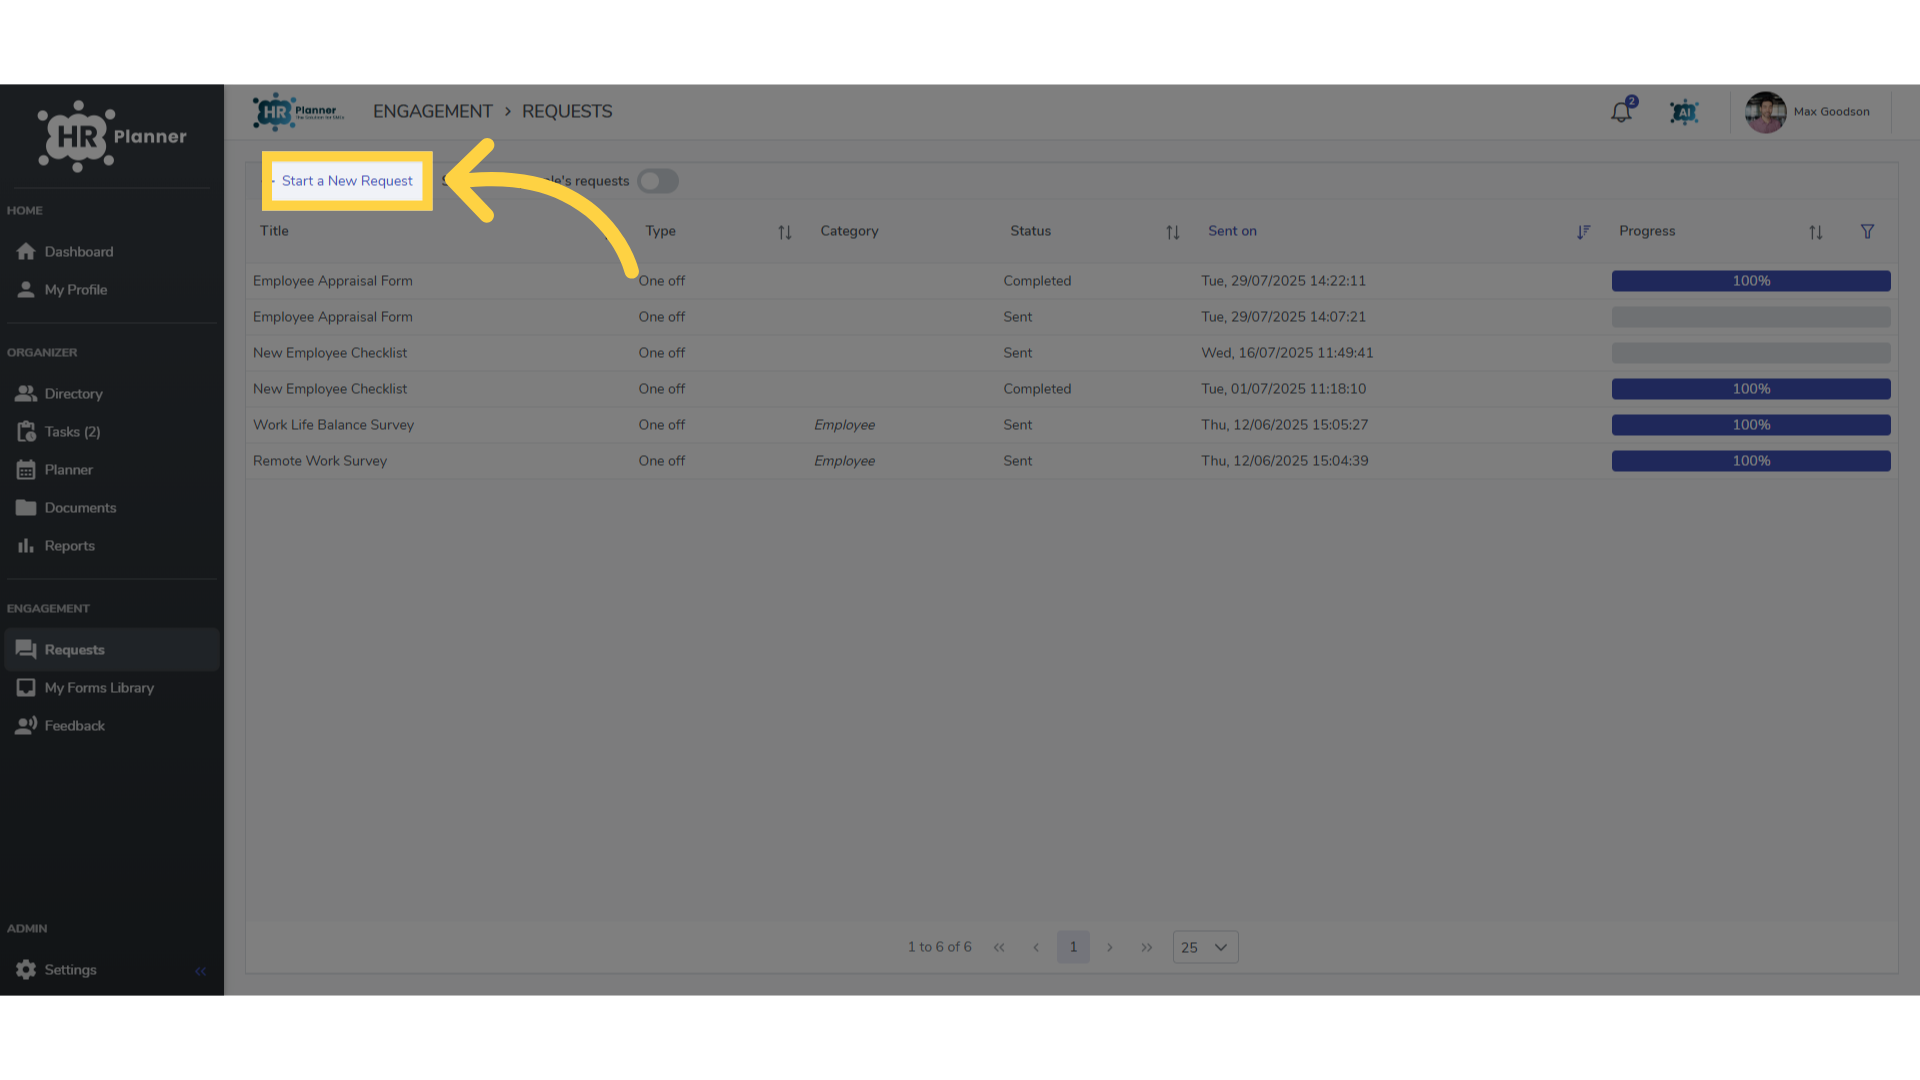
7. Click “Start a New Request”
and click Start a New Request
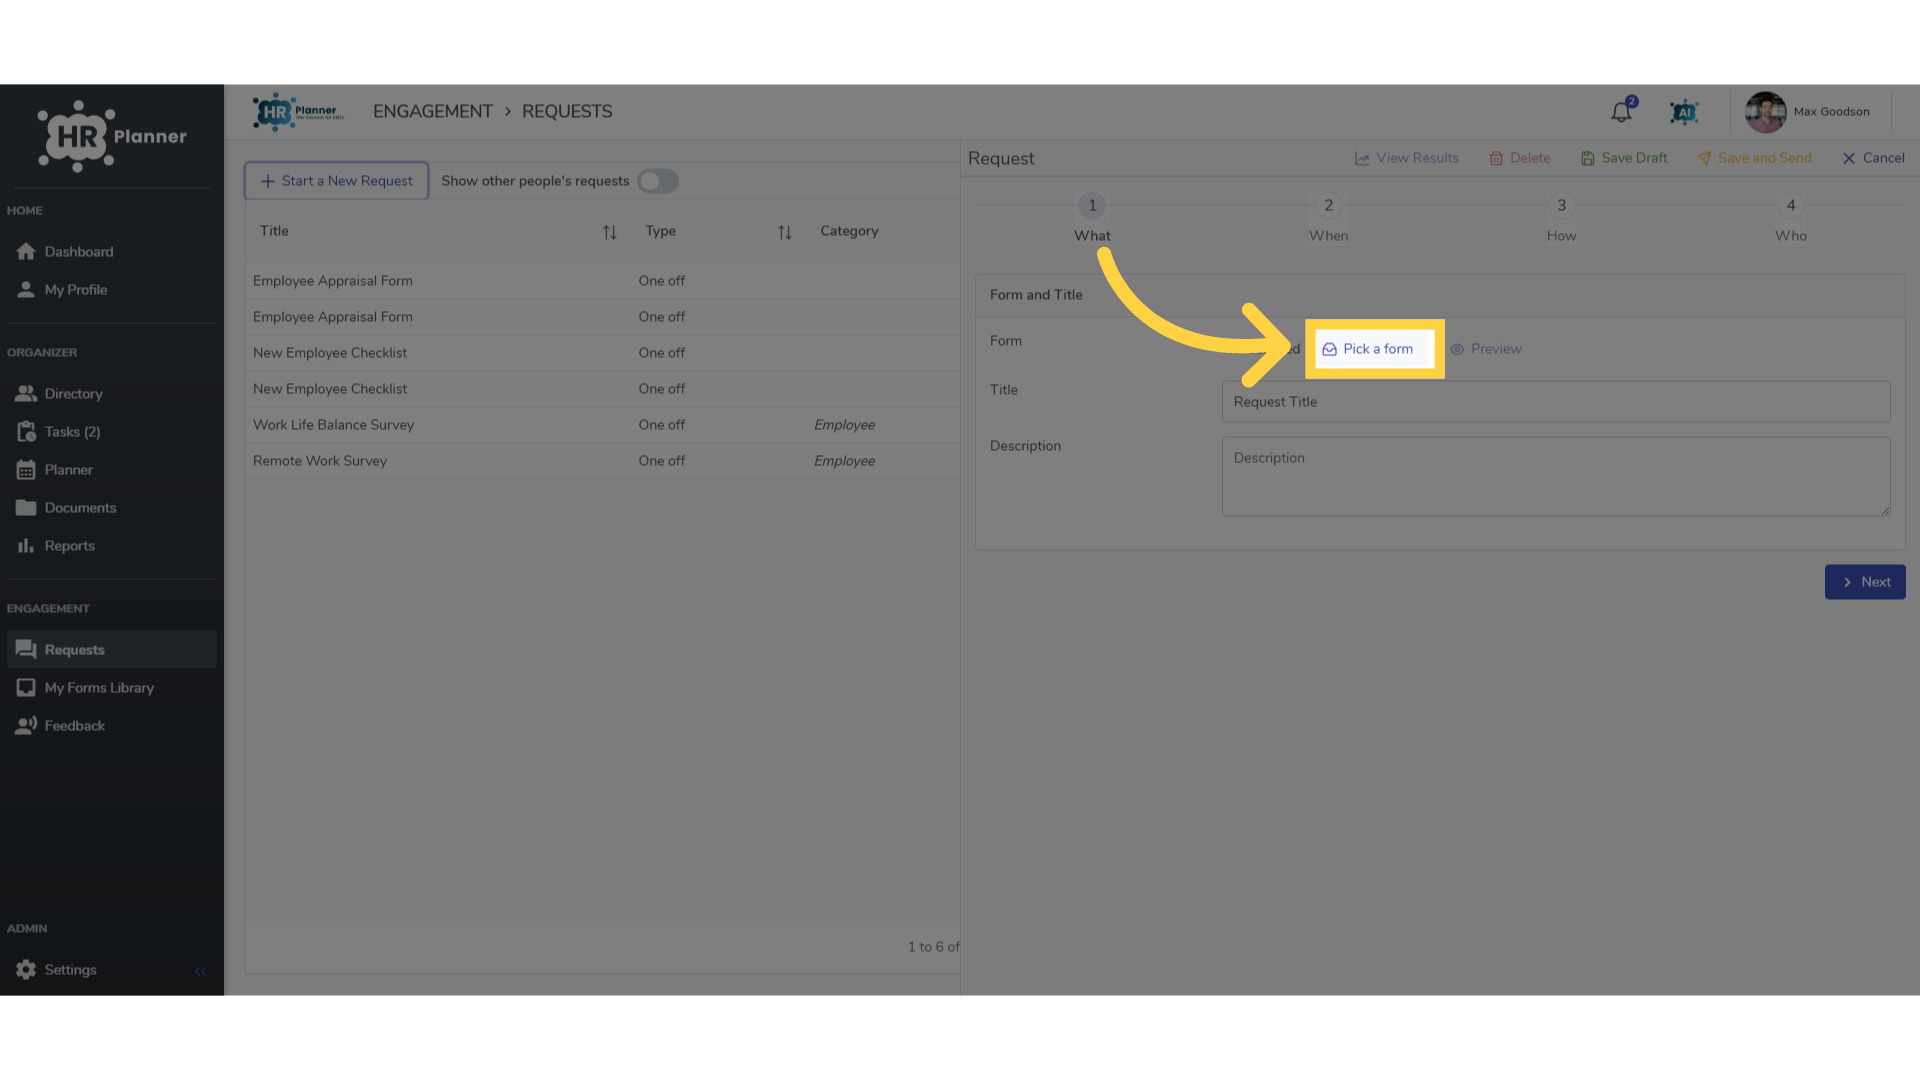
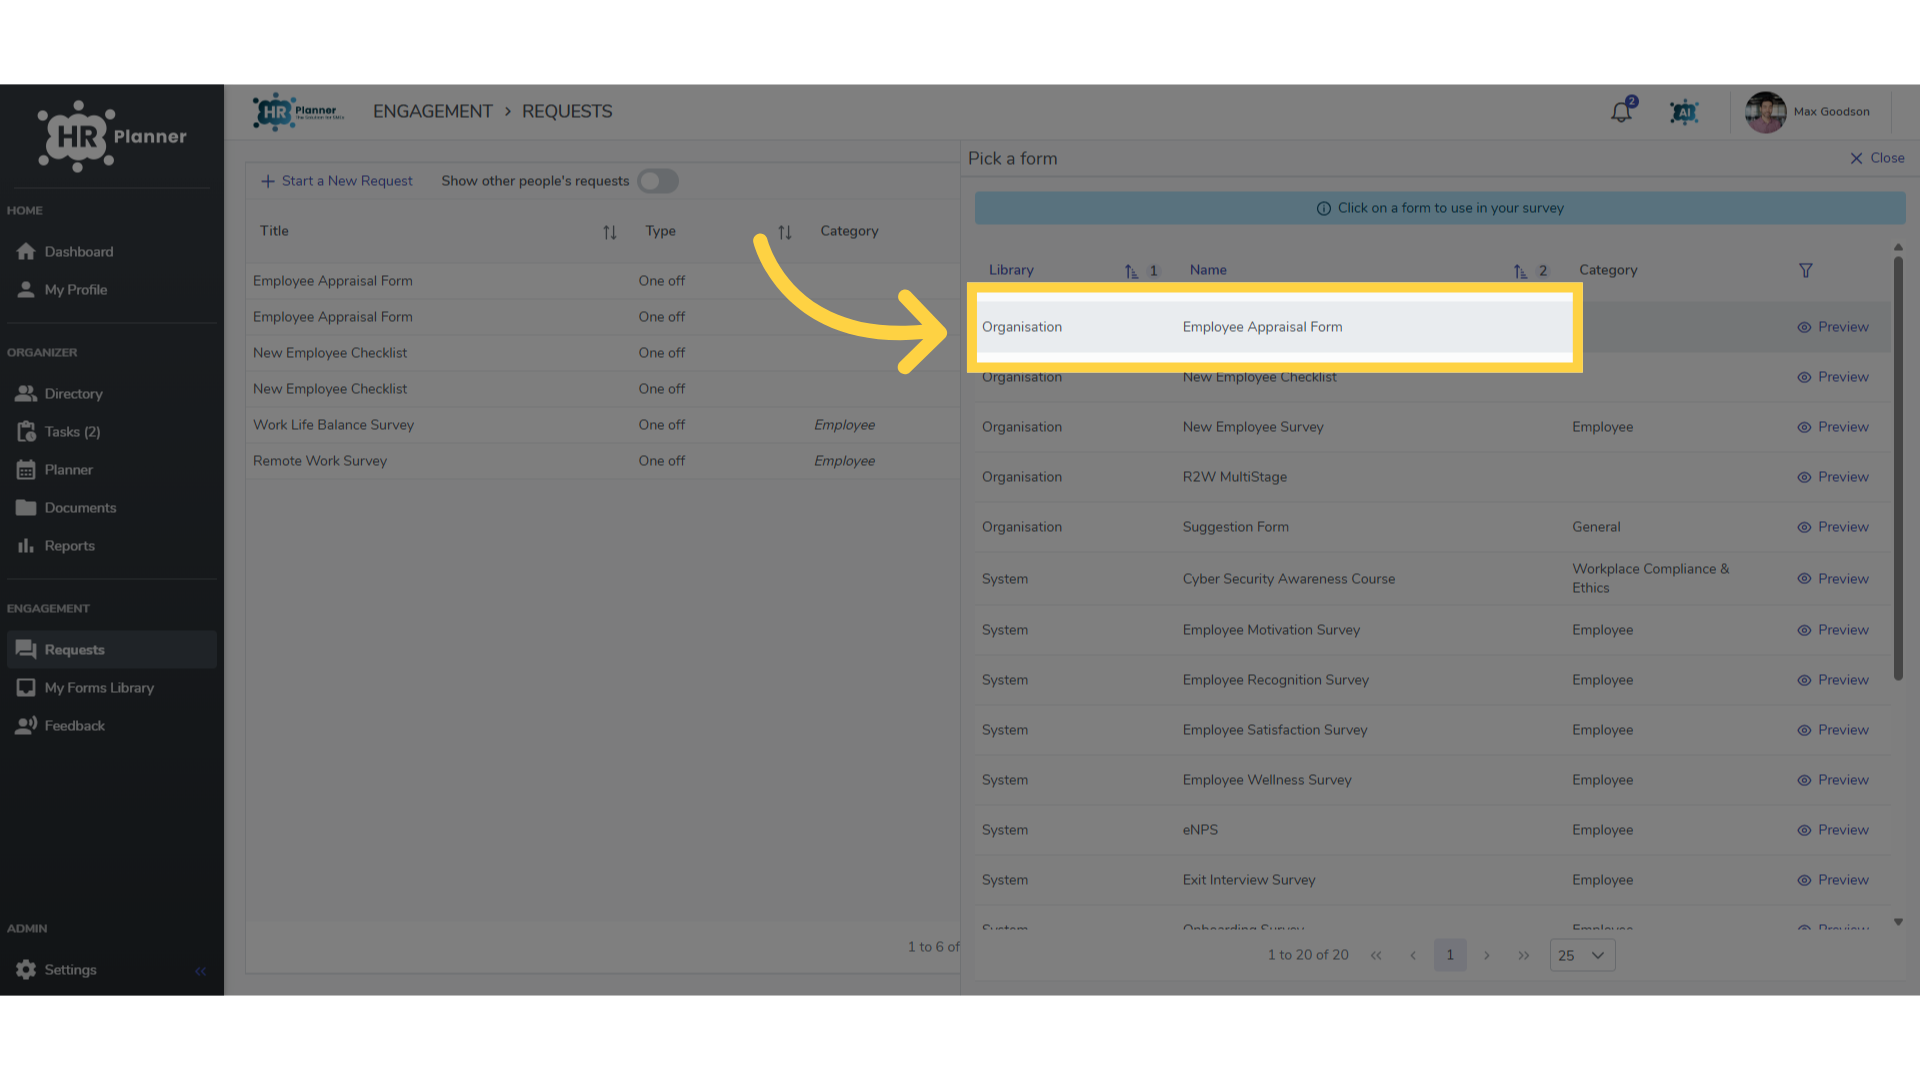
8. Click “Pick a form”
Click Pick A Form
9. Click “Employee Appraisal Form”
Here you can select the appraisal form you have created.
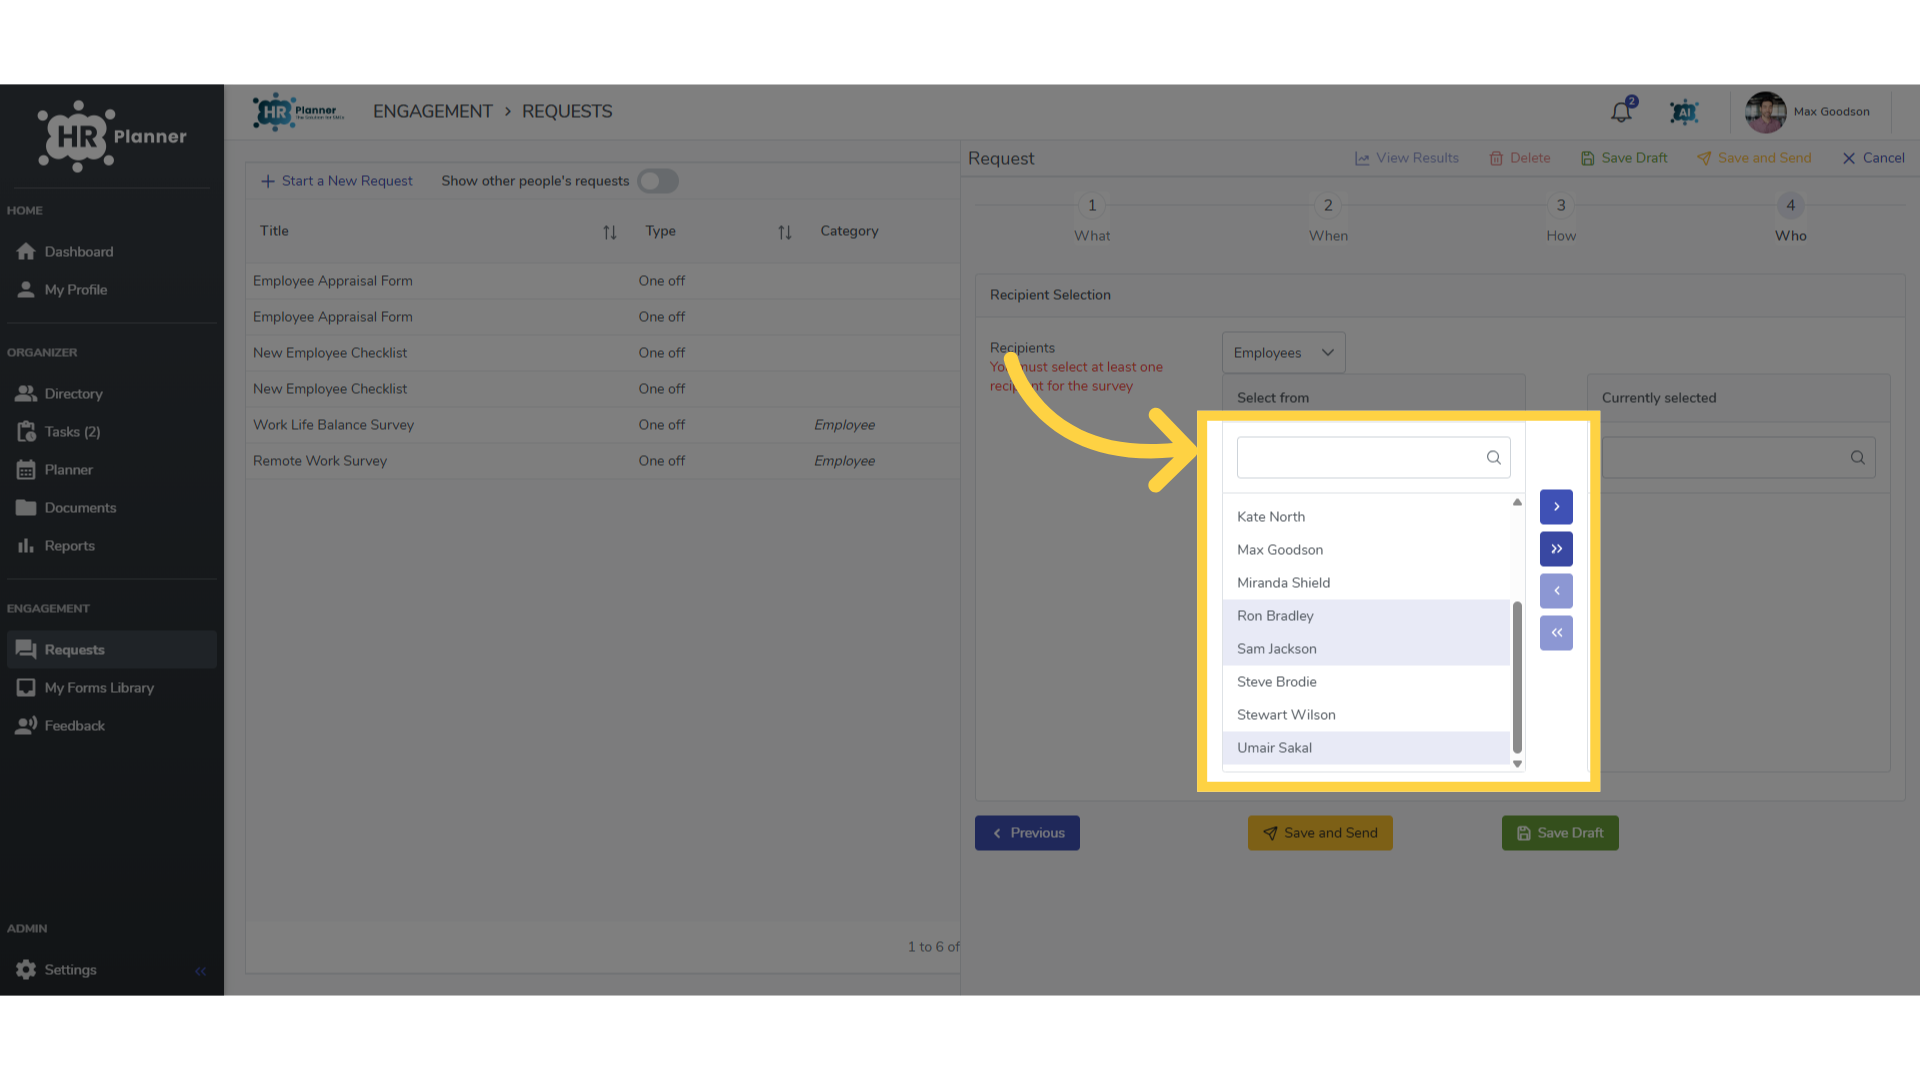
10. Select the employees
Choose the employees….
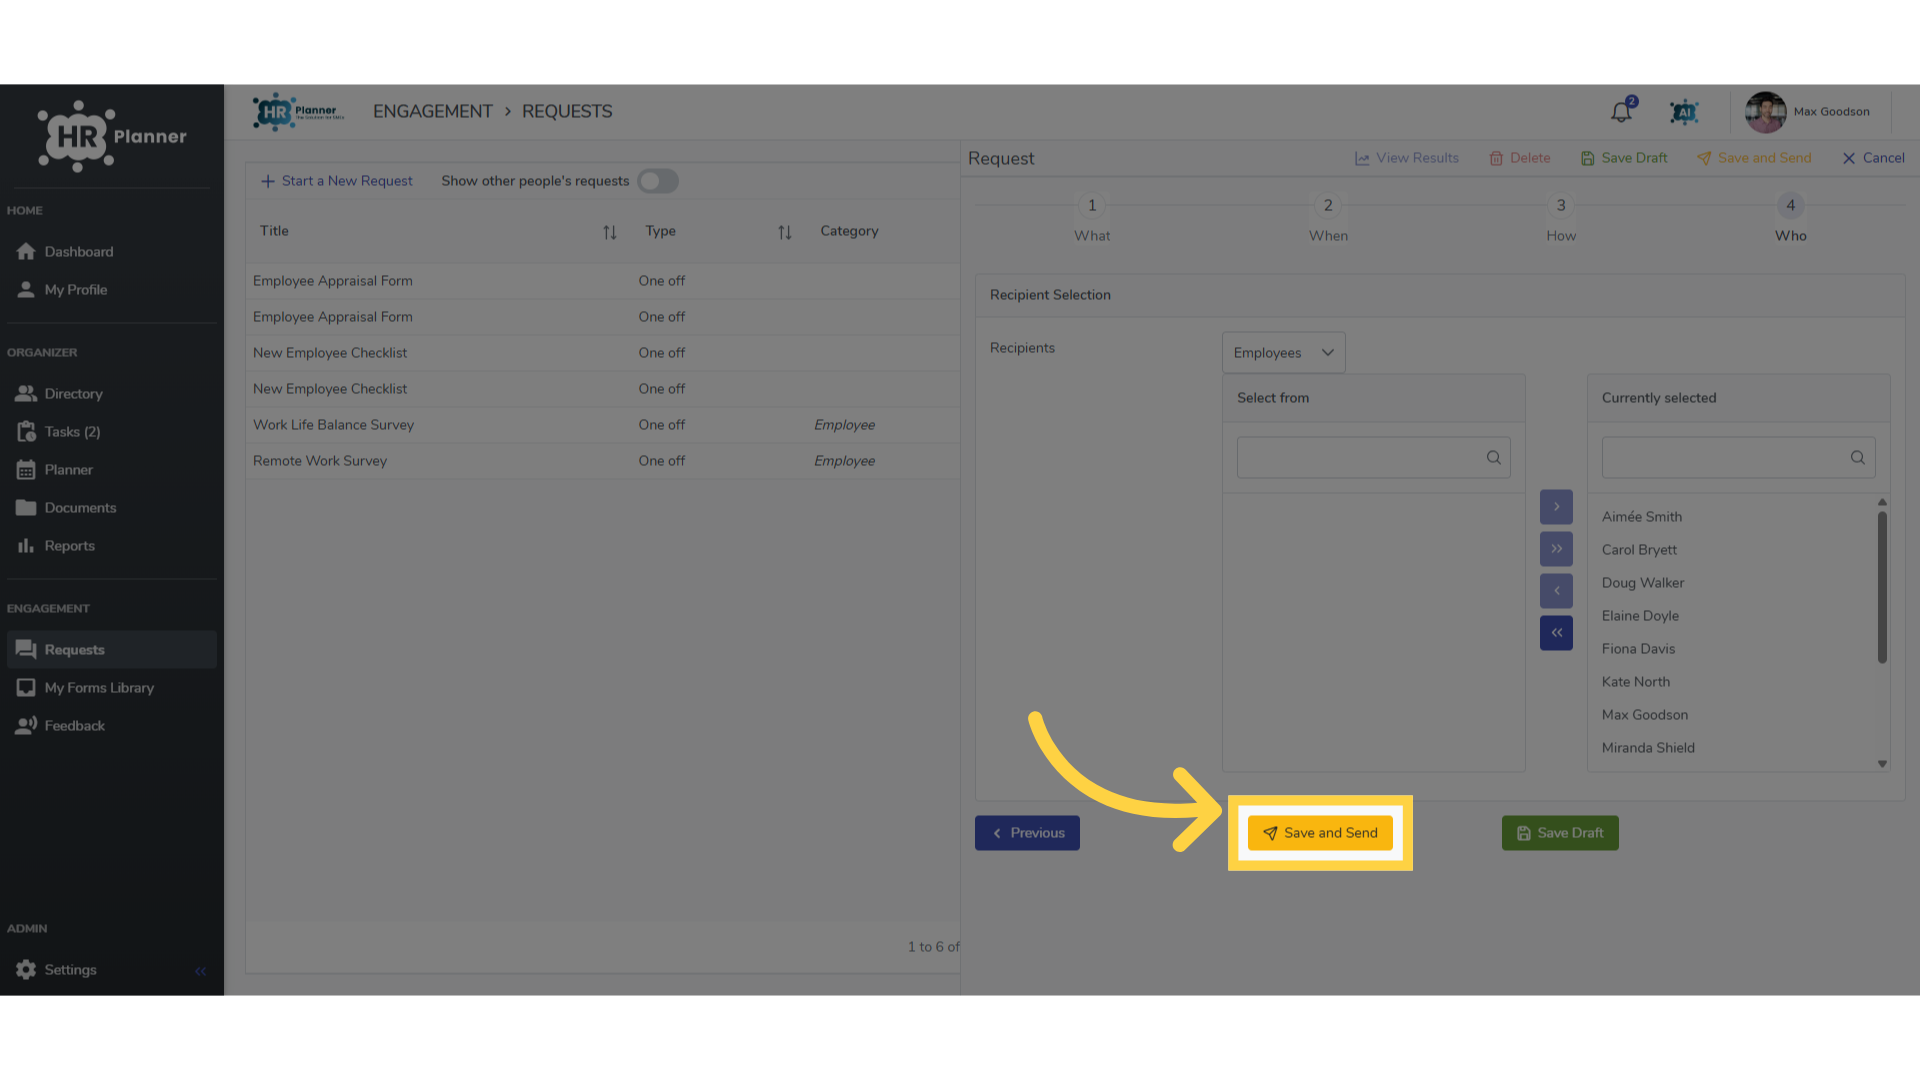
11. Click “Save and Send”
And click Save & Send. This will email notifications to the employees about this task.
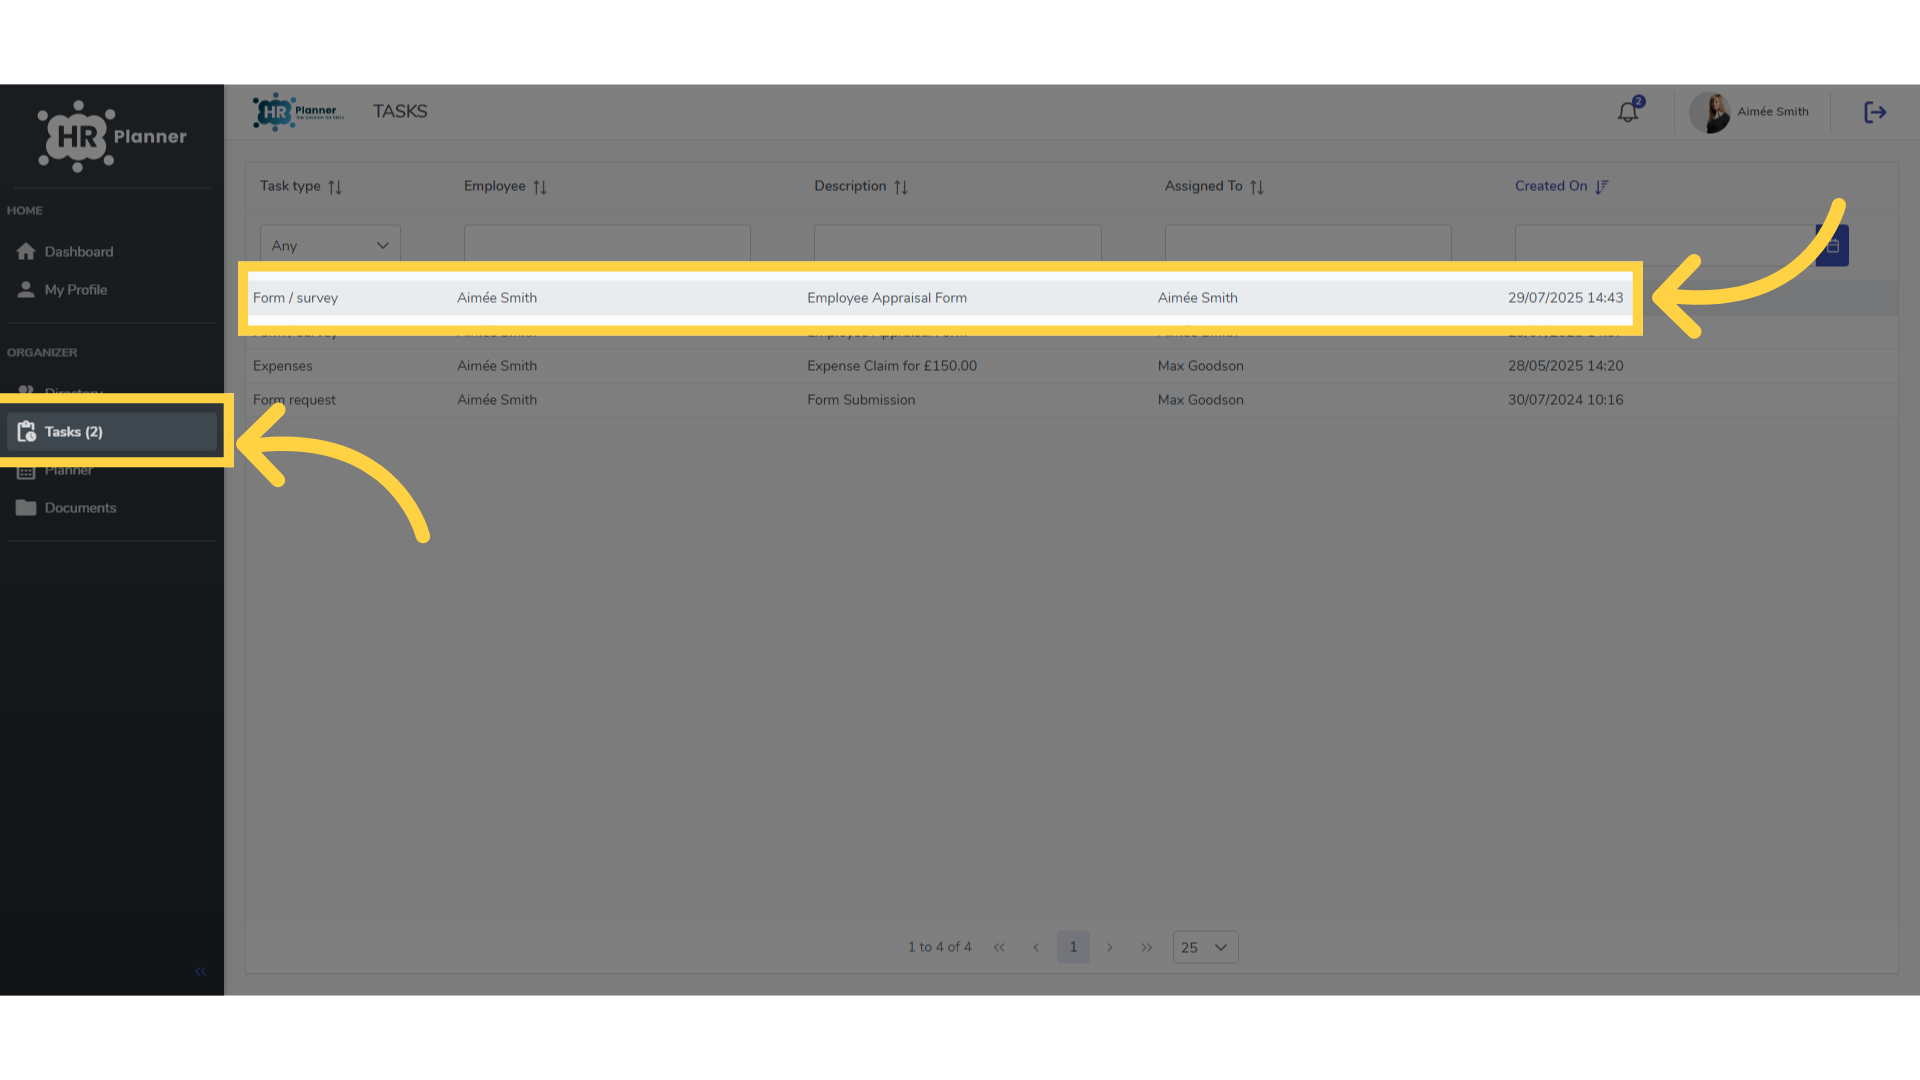
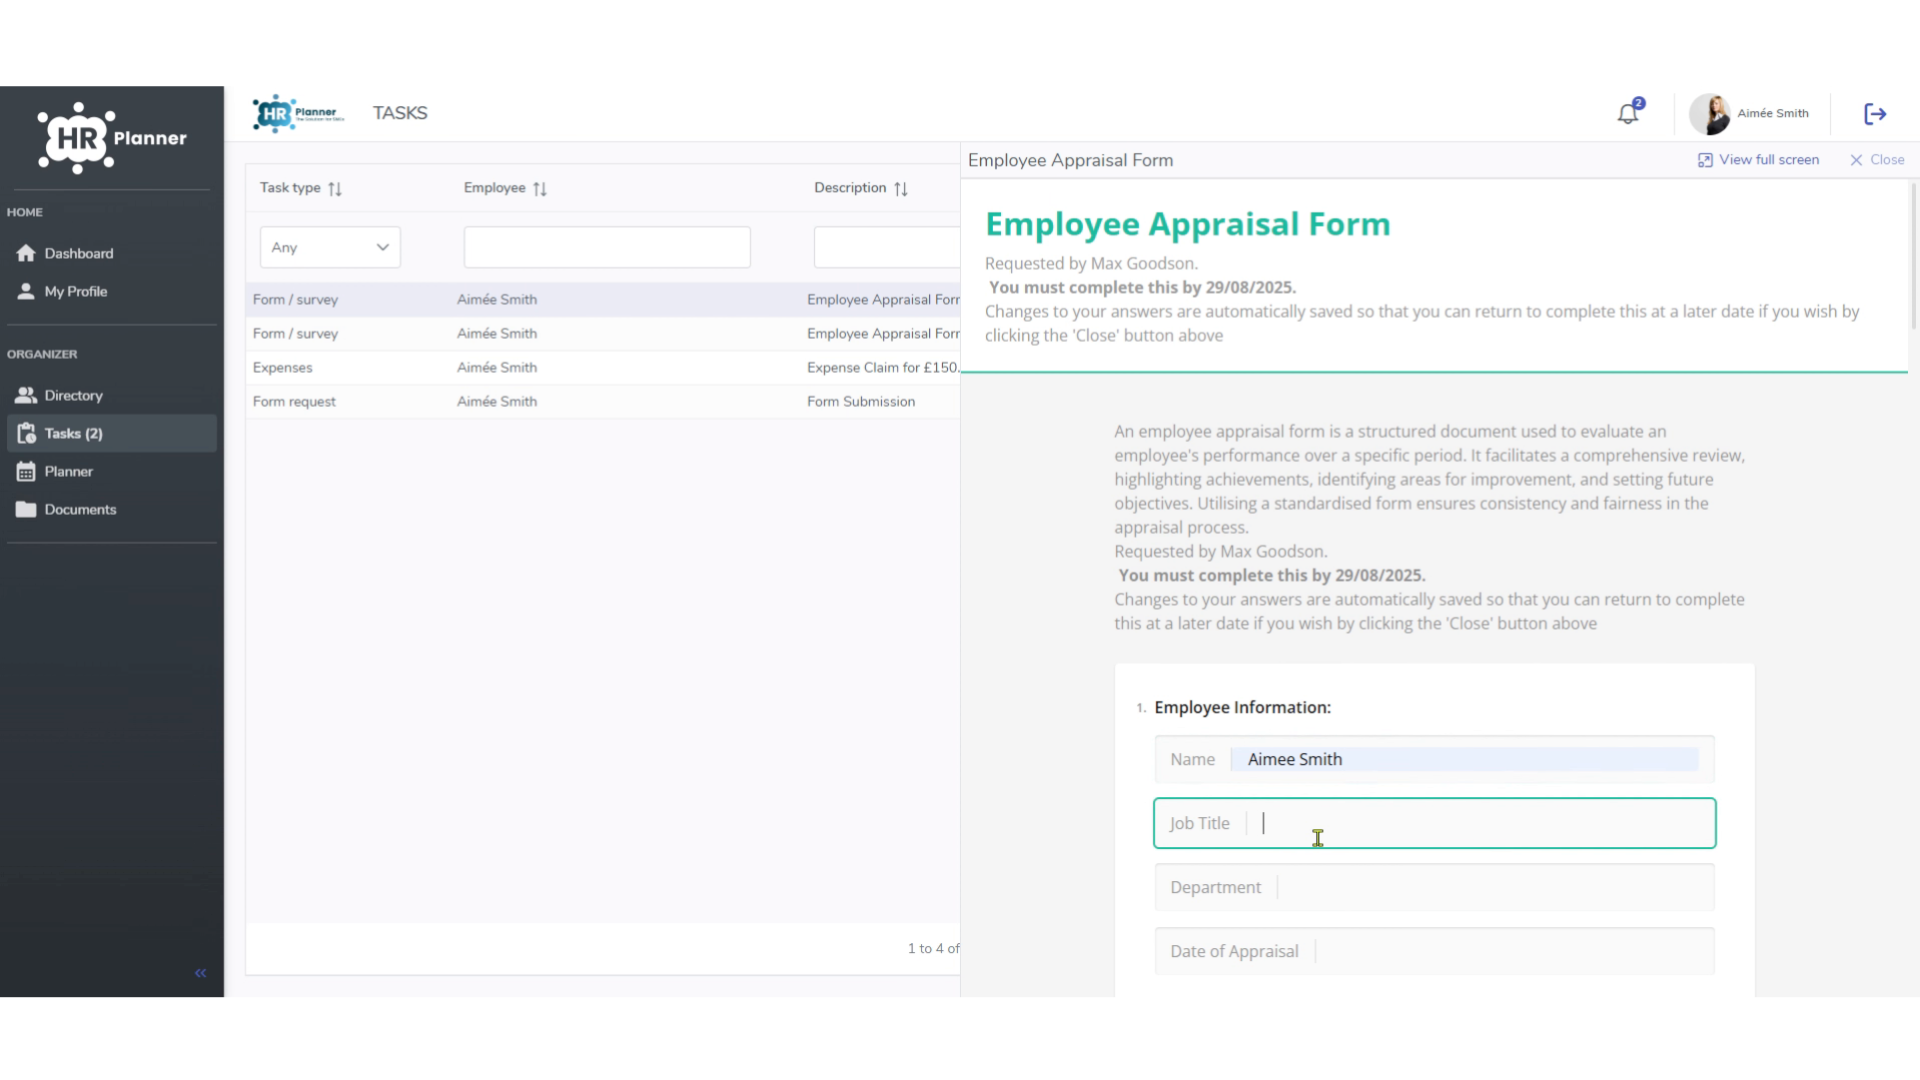
12. Accessing the Form
Employees can access the Form from the Task section on their dashboard.
13. Completing the Form
And answer each question until completed.
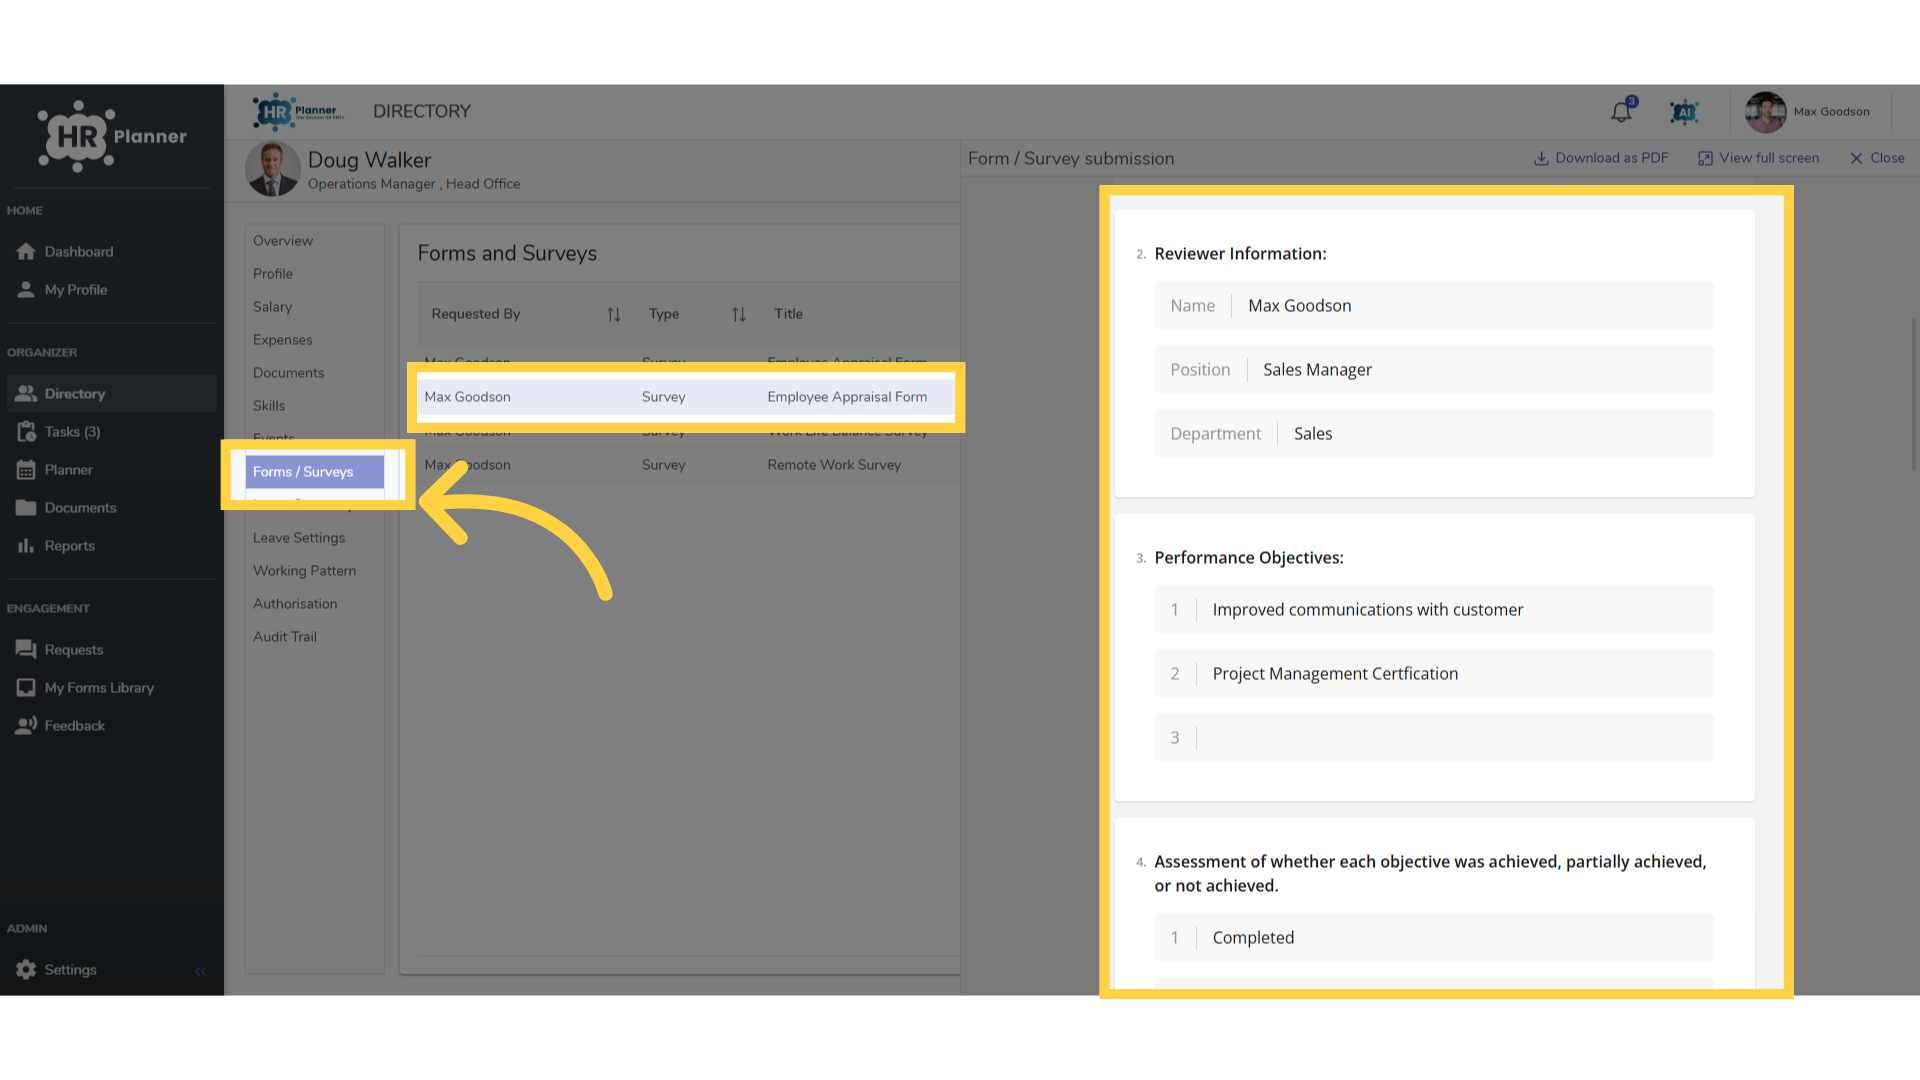
14. Viewing Completed Forms
Completed forms can be viewed in the Forms/Surveys section on the employees record.
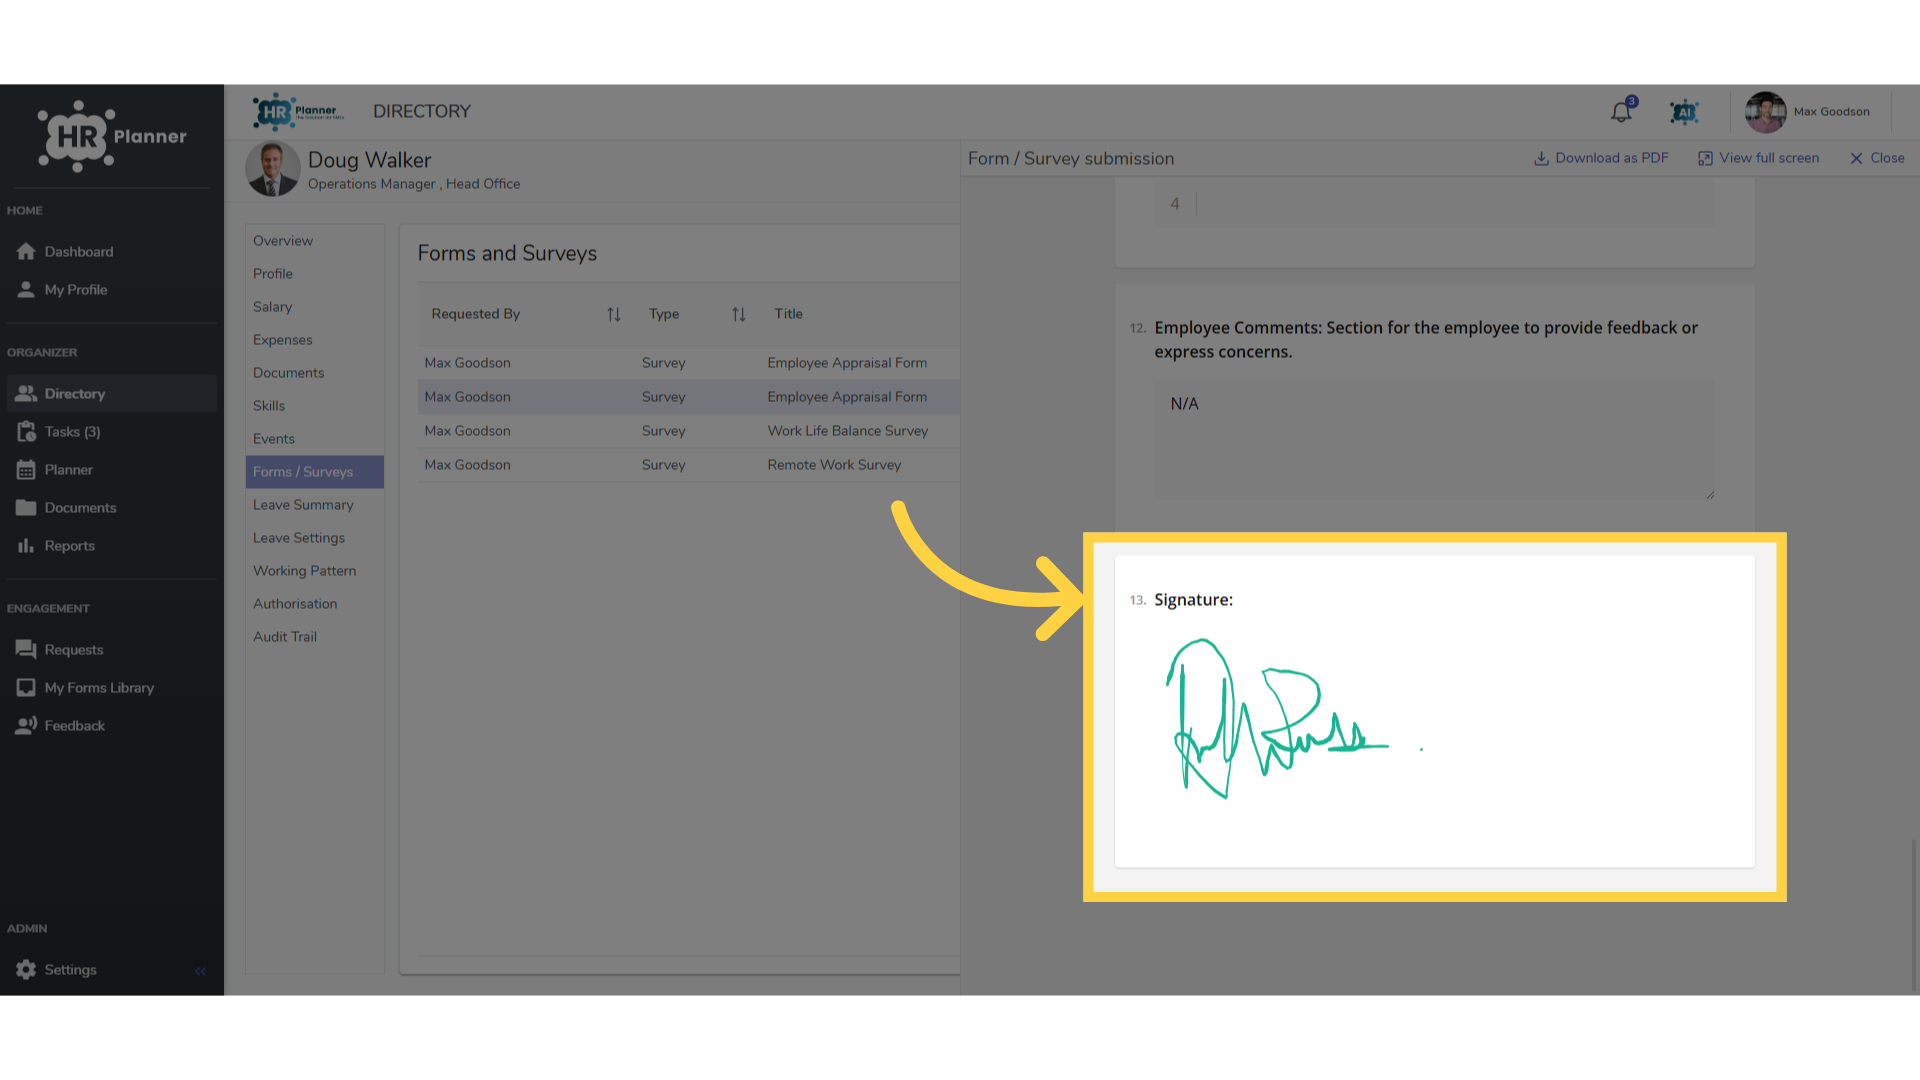
15. Signing Completed Forms
Employees can even be asked to sign completed forms too.
This guide covered accessing settings, navigating forms, selecting employees, filling in appraisal details, and reviewing information within the Employee Appraisal Forms on HR planner